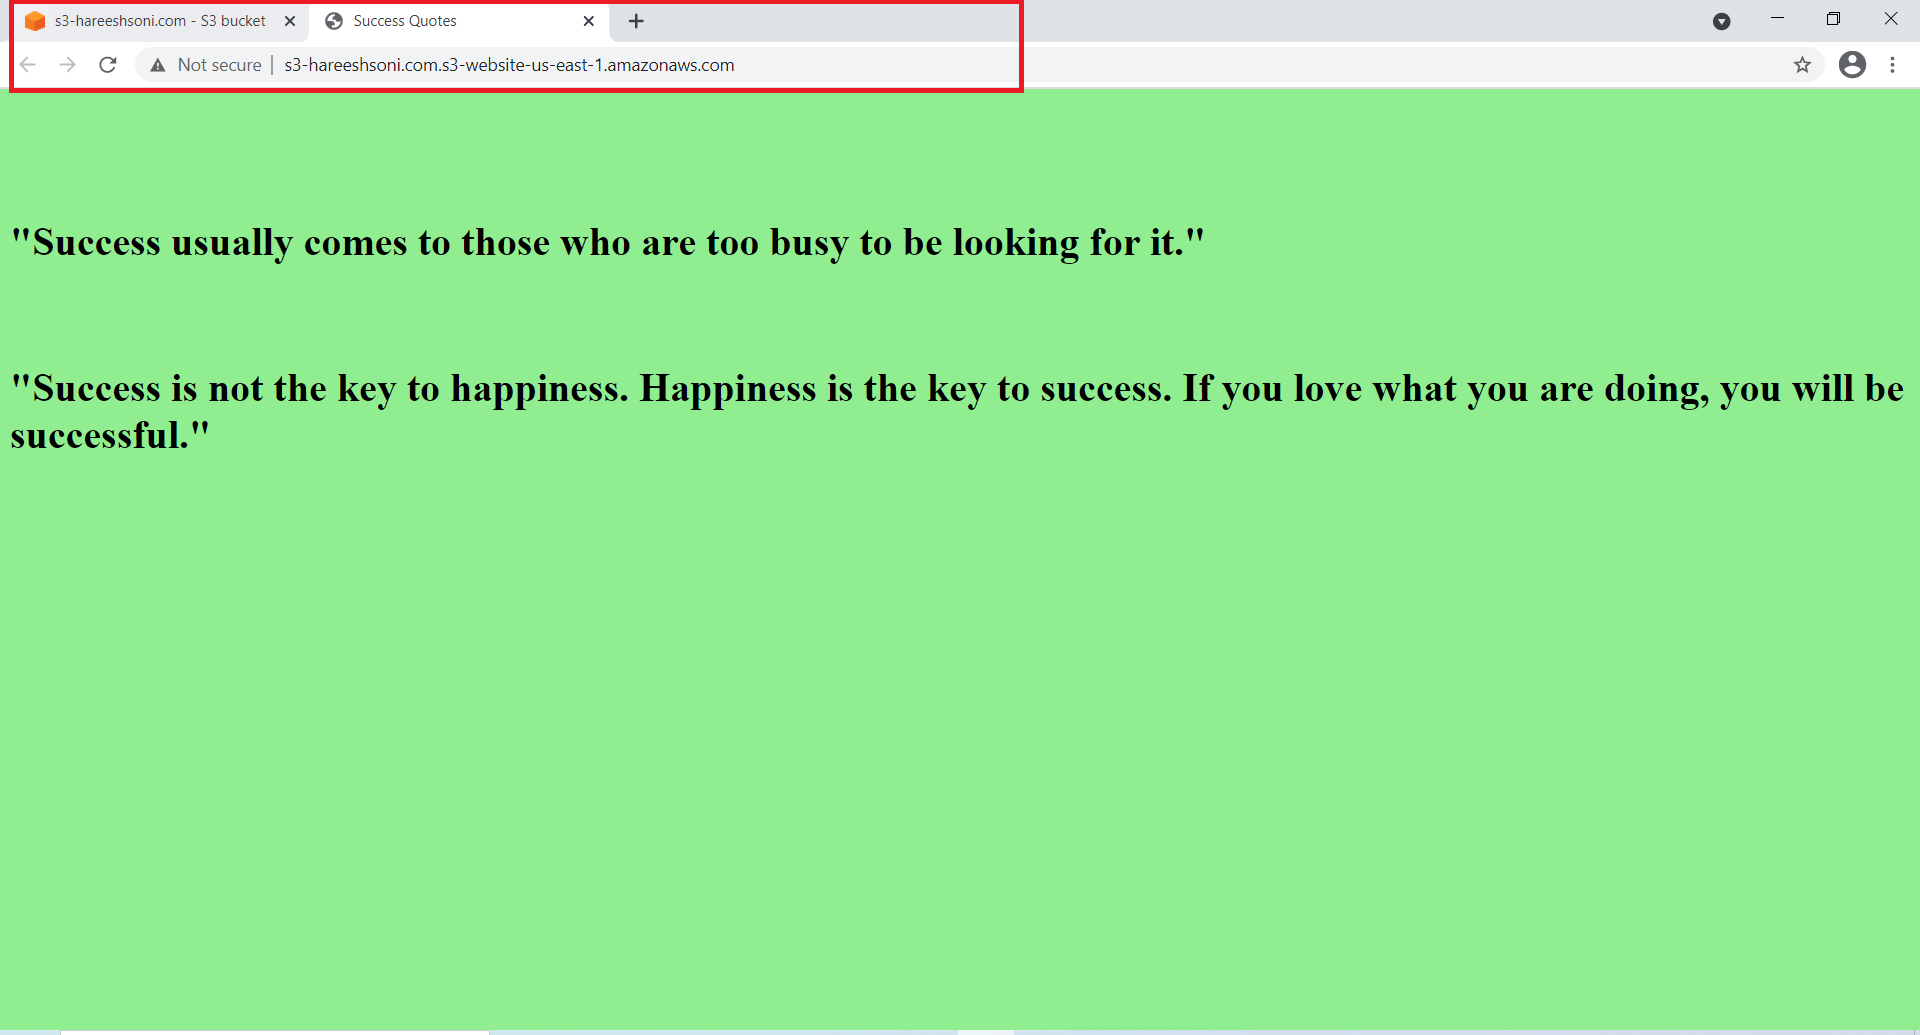
Contents [hide]
AWS S3
Amazon S3 or Amazon Simple Storage Service is a service offered by Amazon Web Services (AWS) that provides object storage through a web service interface.
Create S3 bucket in AWS
We need to follow below steps:
Step 1: Sign in AWS Account. Click on the S3 icon under recently visited services. If it is not visible search S3 in the search bar. Click on the S3 icon.

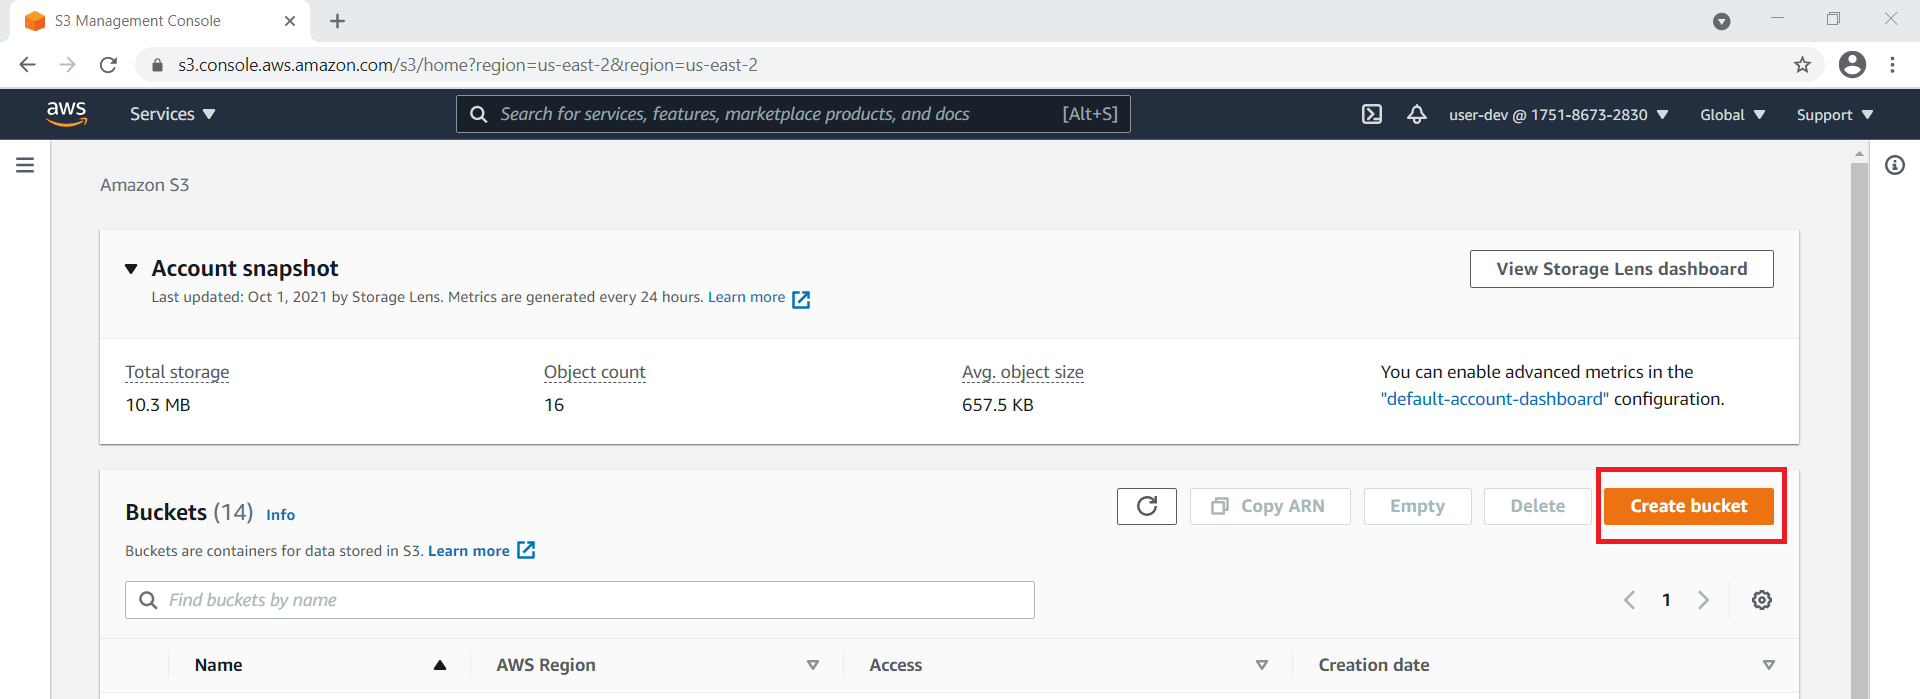
Step 2: Click on the Create bucket button.
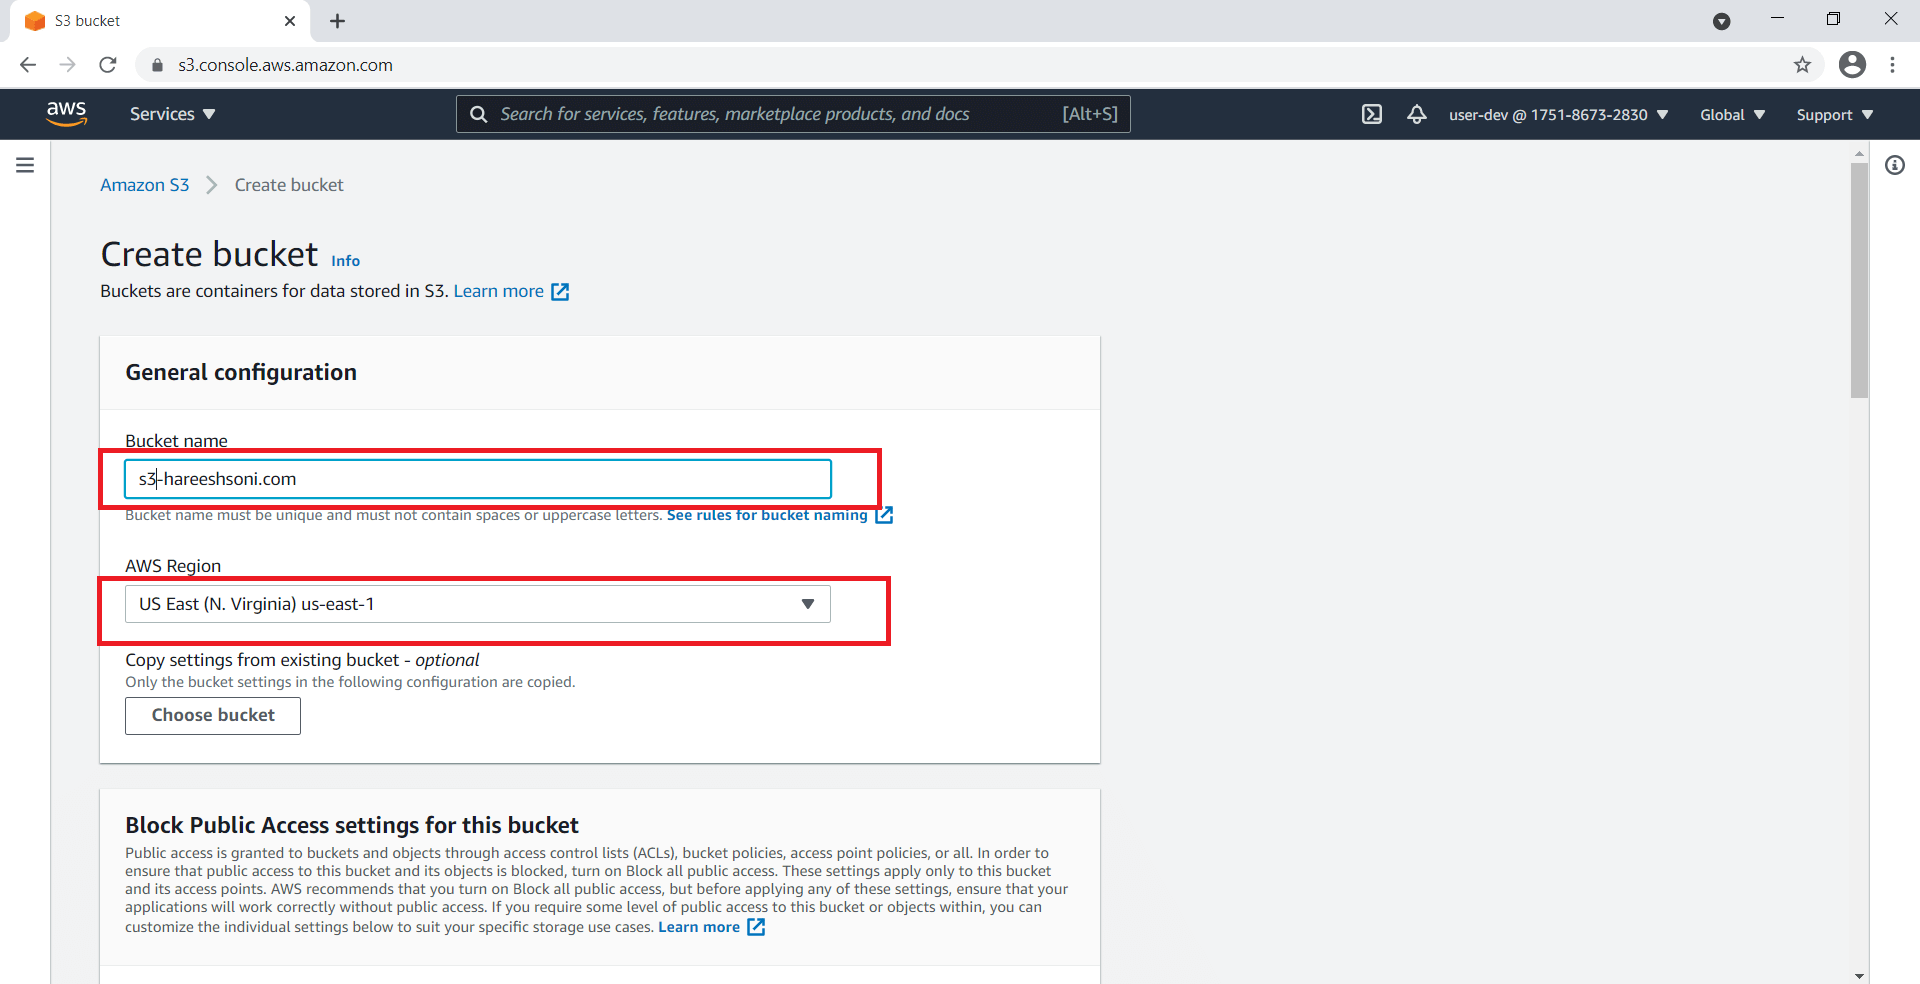
Step 3: Enter bucket name and select AWS Region.
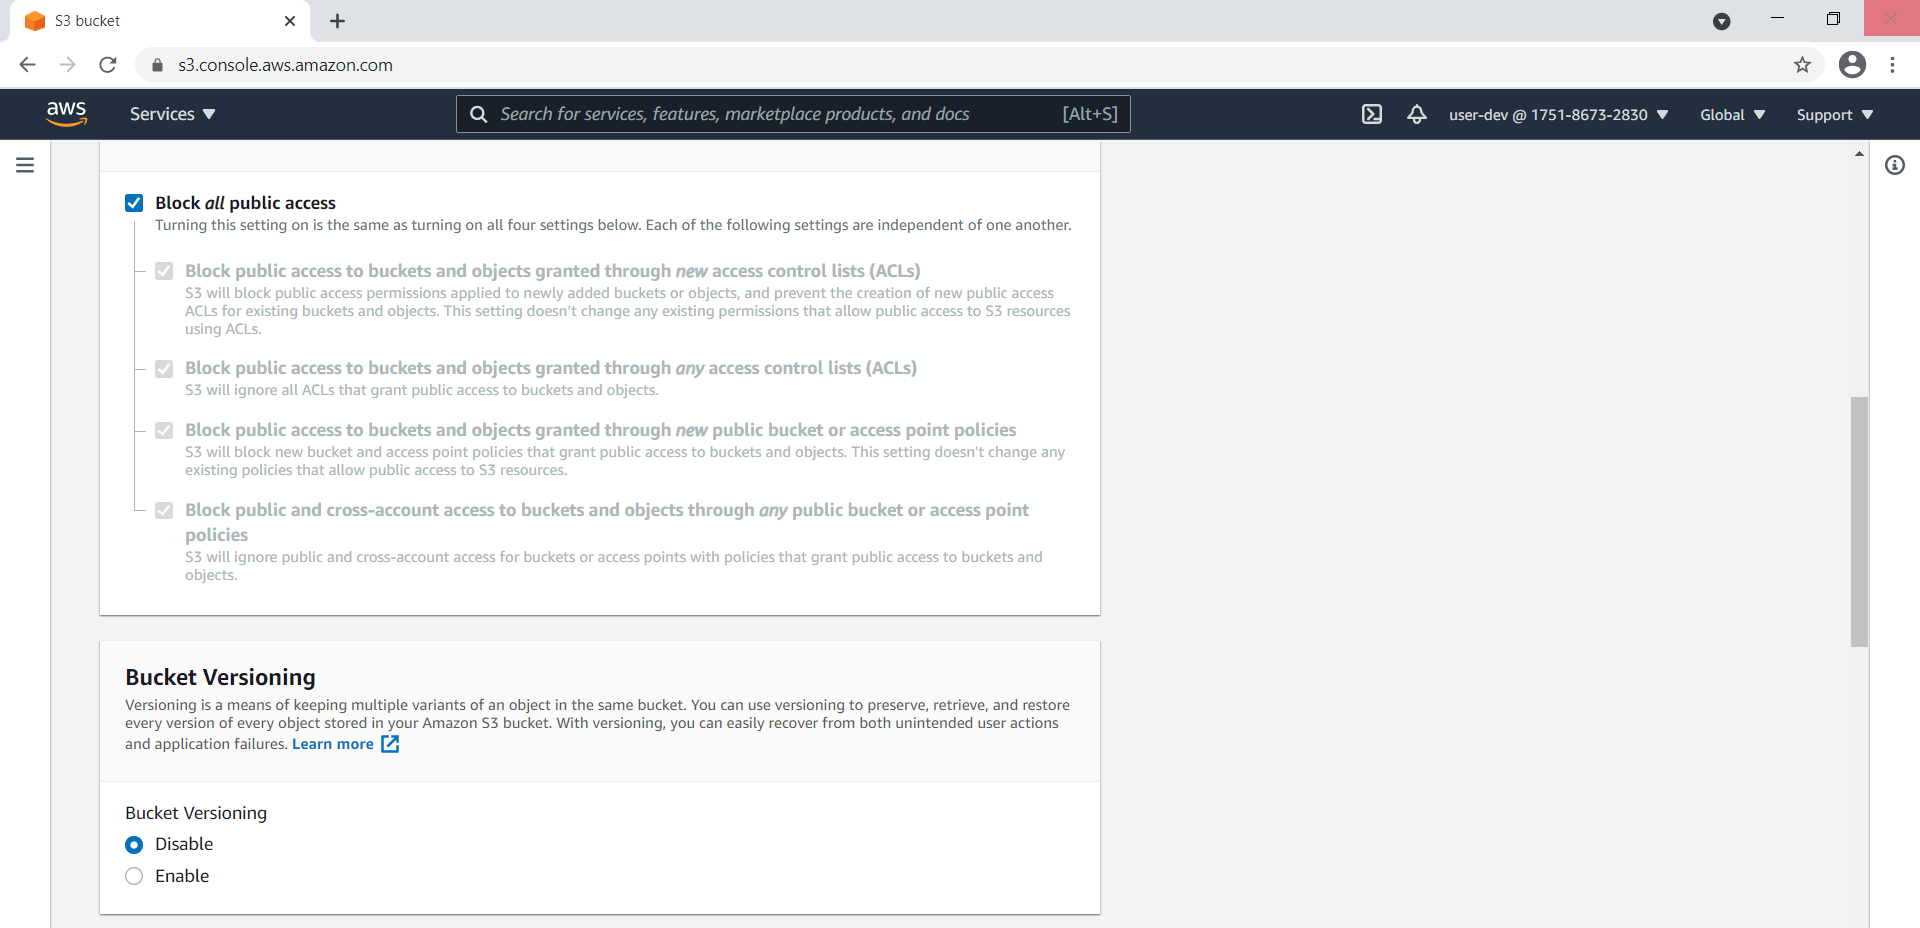
Step 4: Click on the Create bucket.
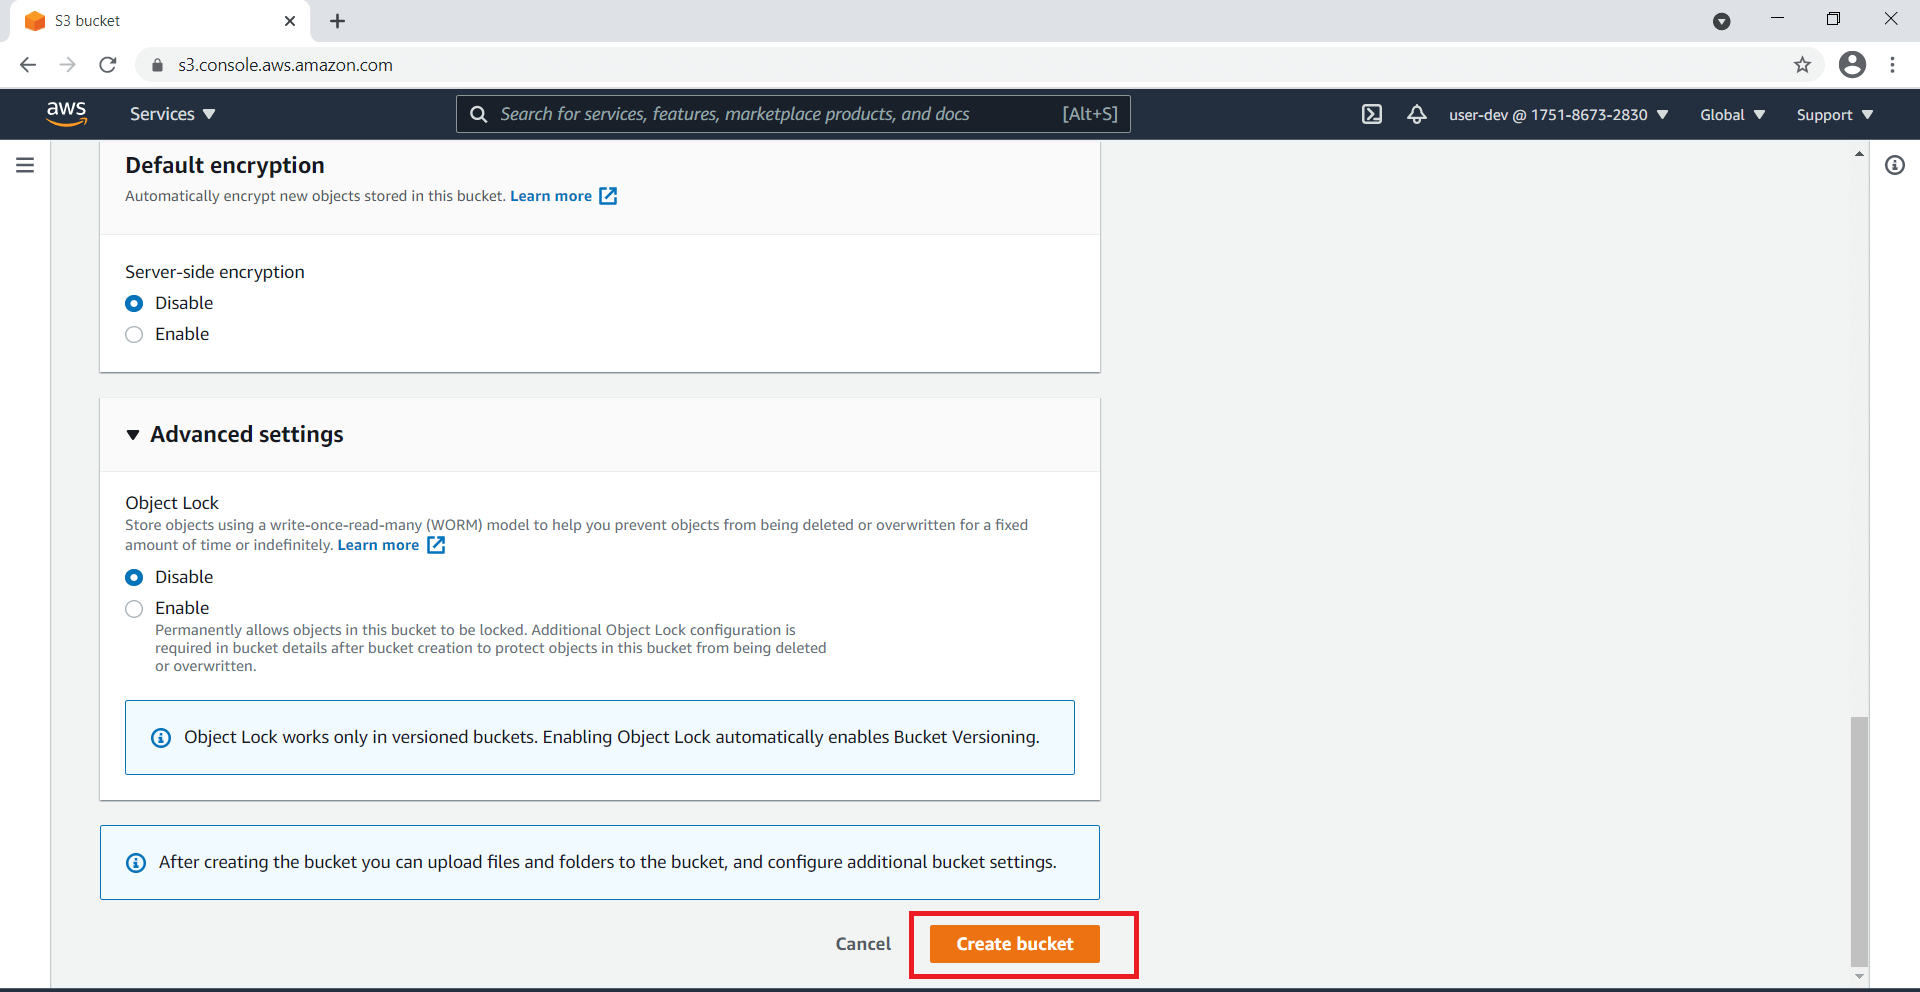
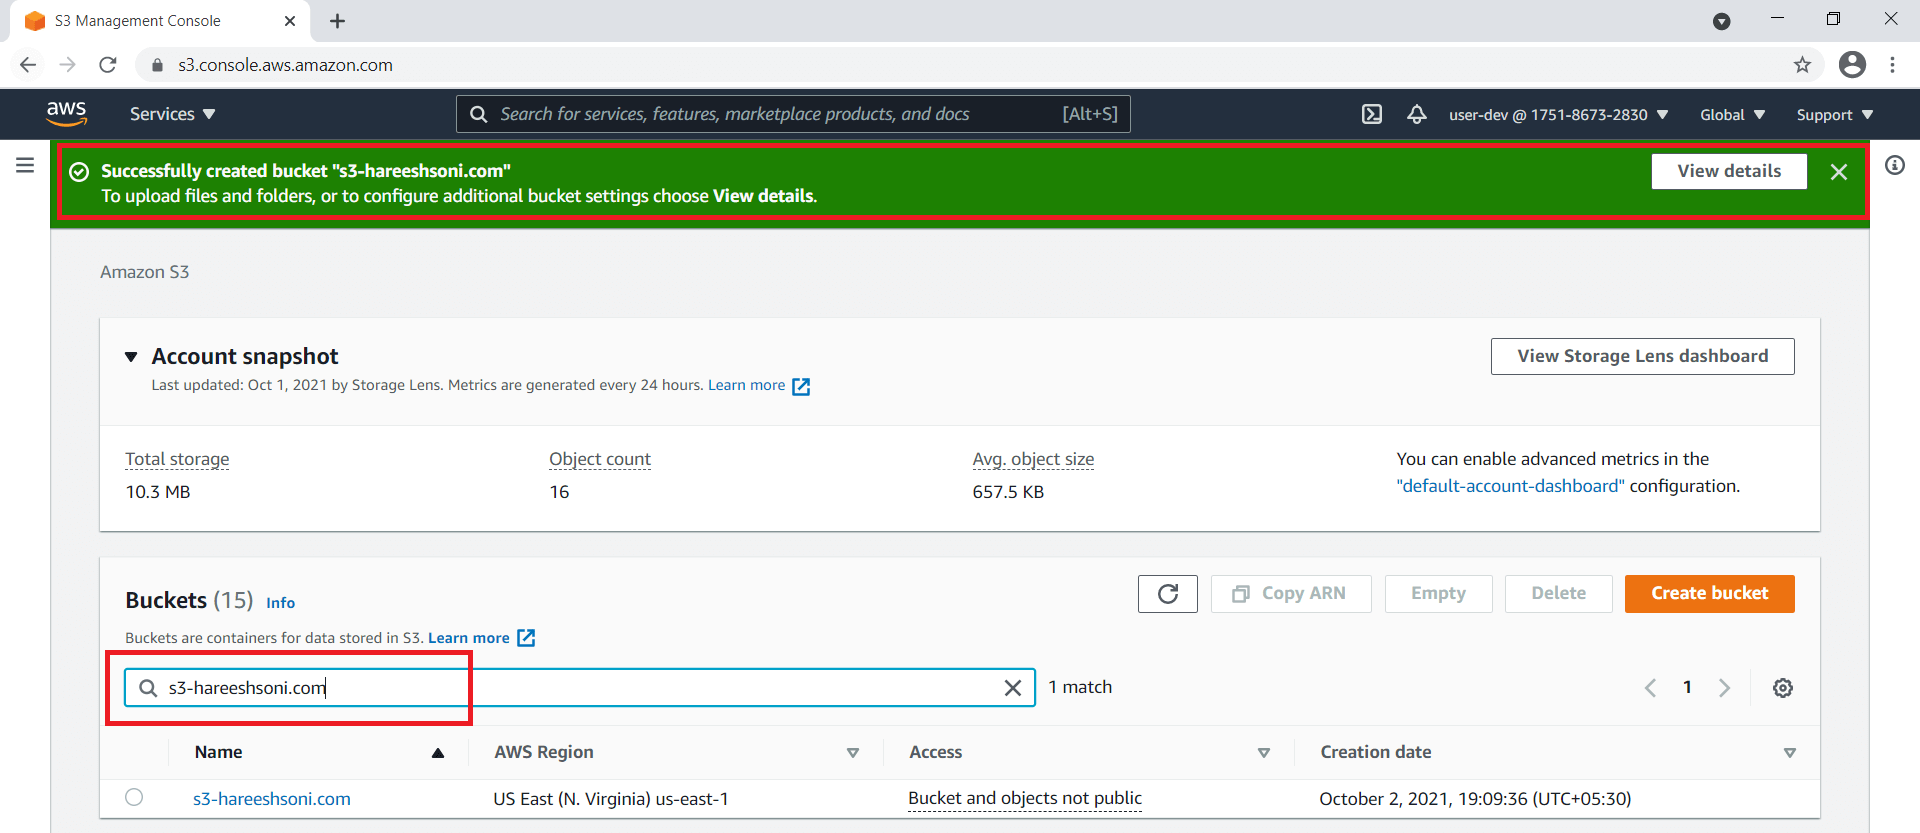
Step 5: Now you can see the bucket creation success message. You can search created bucket using the bucket name.
Upload files/ folder in AWS S3
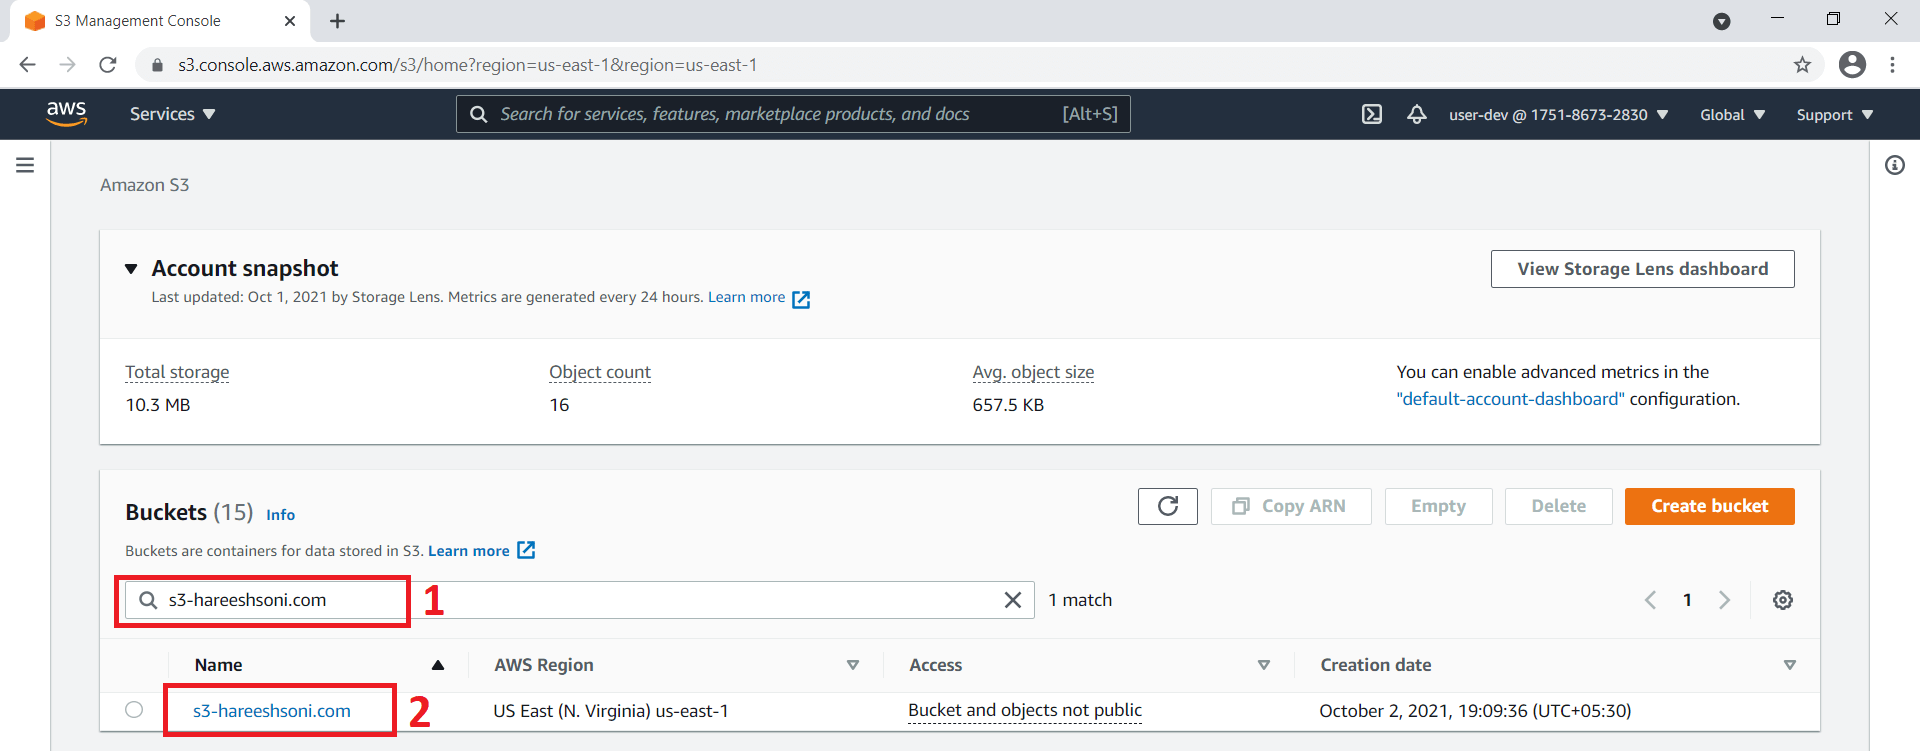
Step 1: Search bucket using bucket name. Click on bucket name.
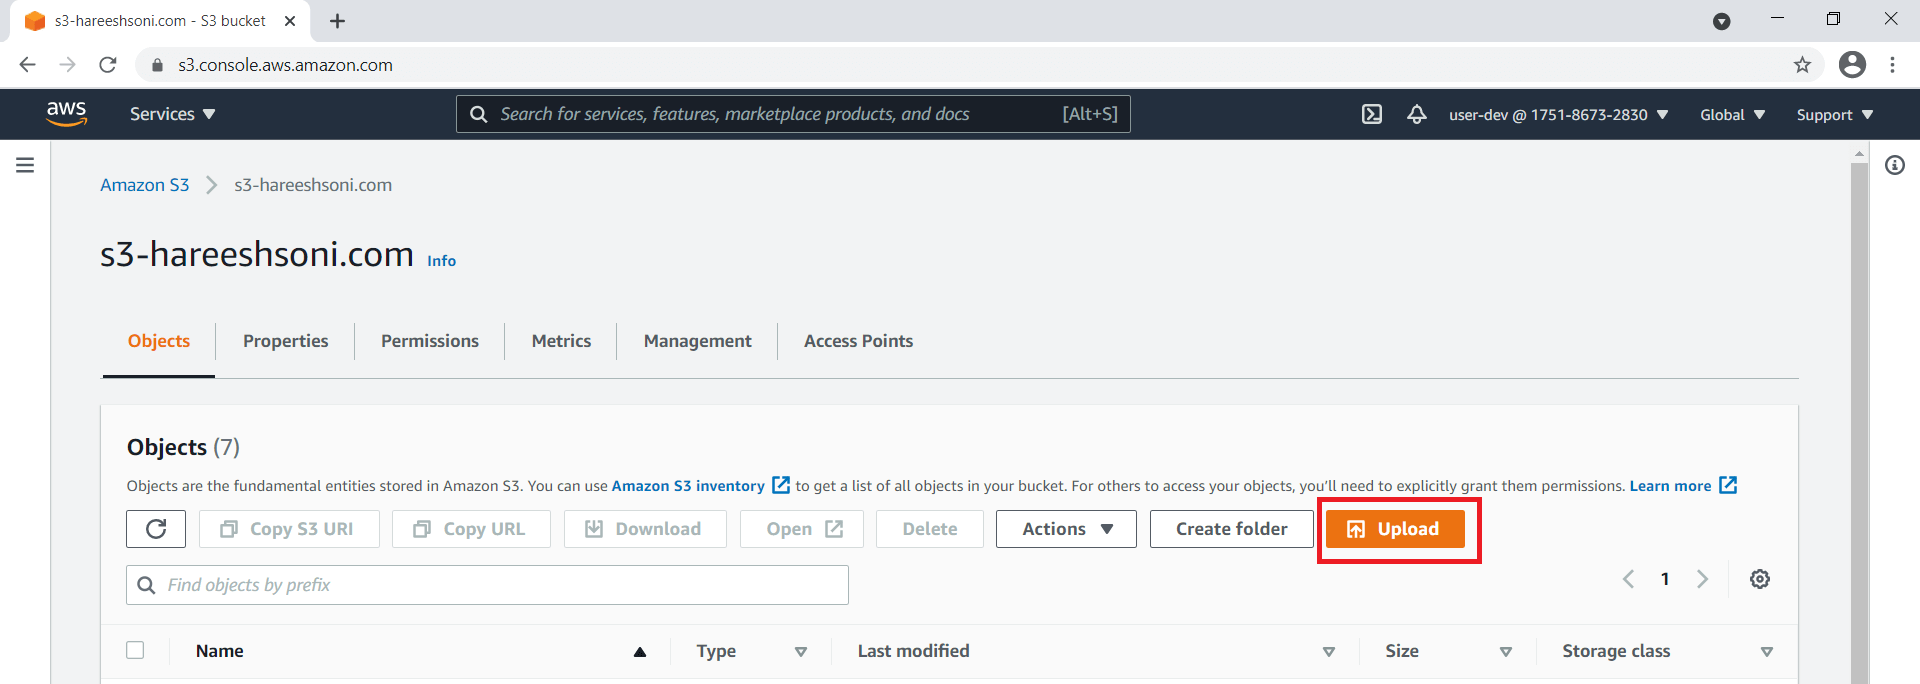
Step 2: Click on the Upload button.
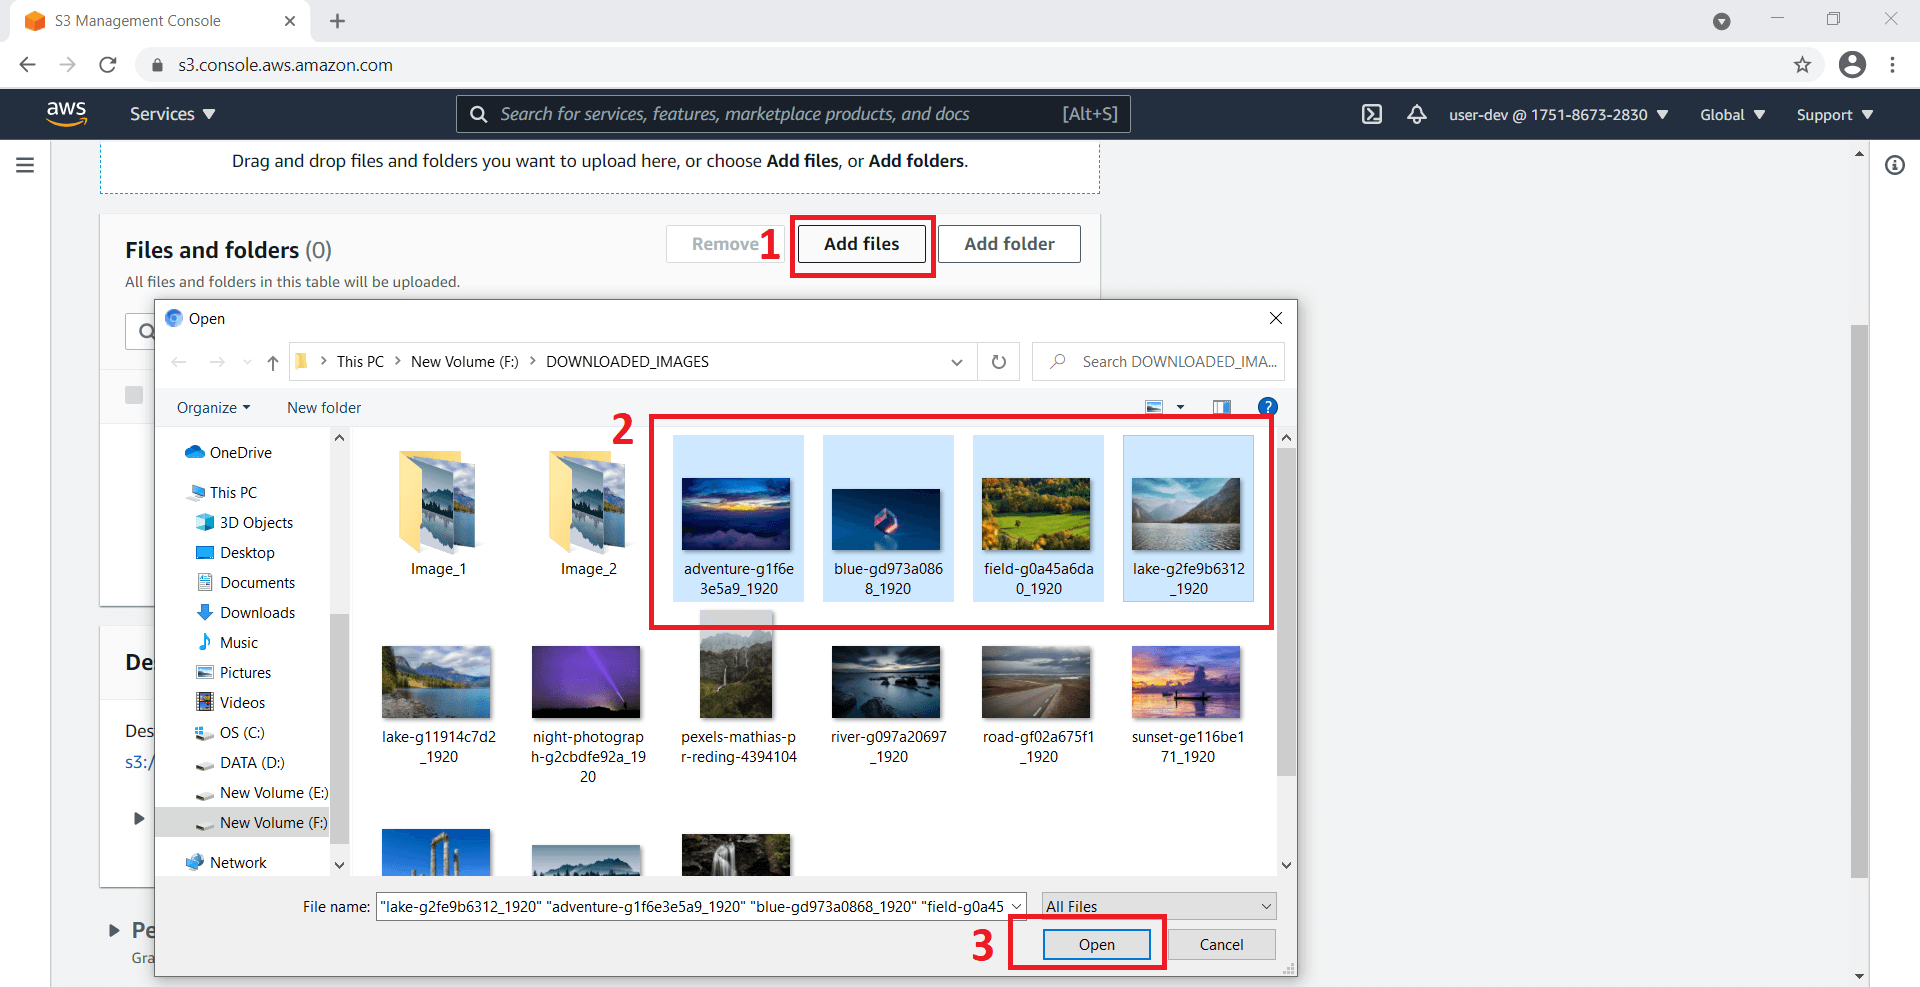
Step 3: For uploading files. Click on Add files button. The upload window will open select files which need to upload. Click on the Open button.
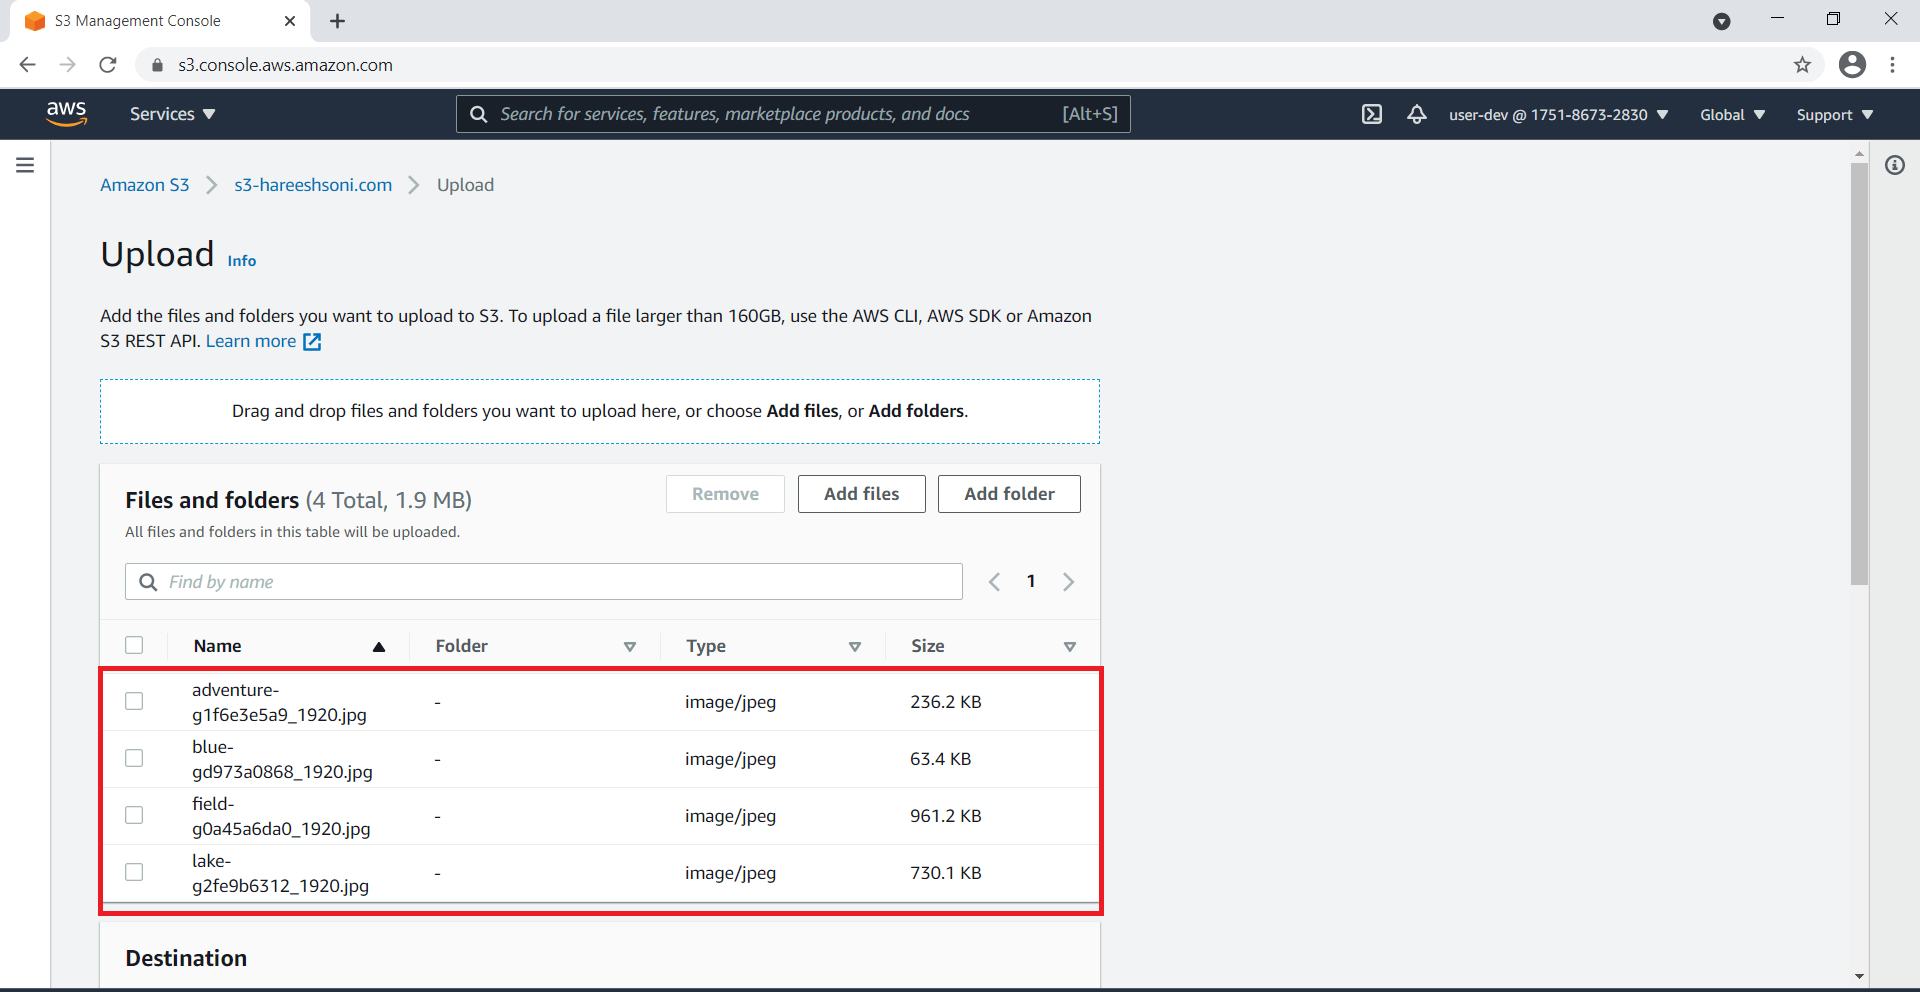
Step 4: Now you can see uploaded files.
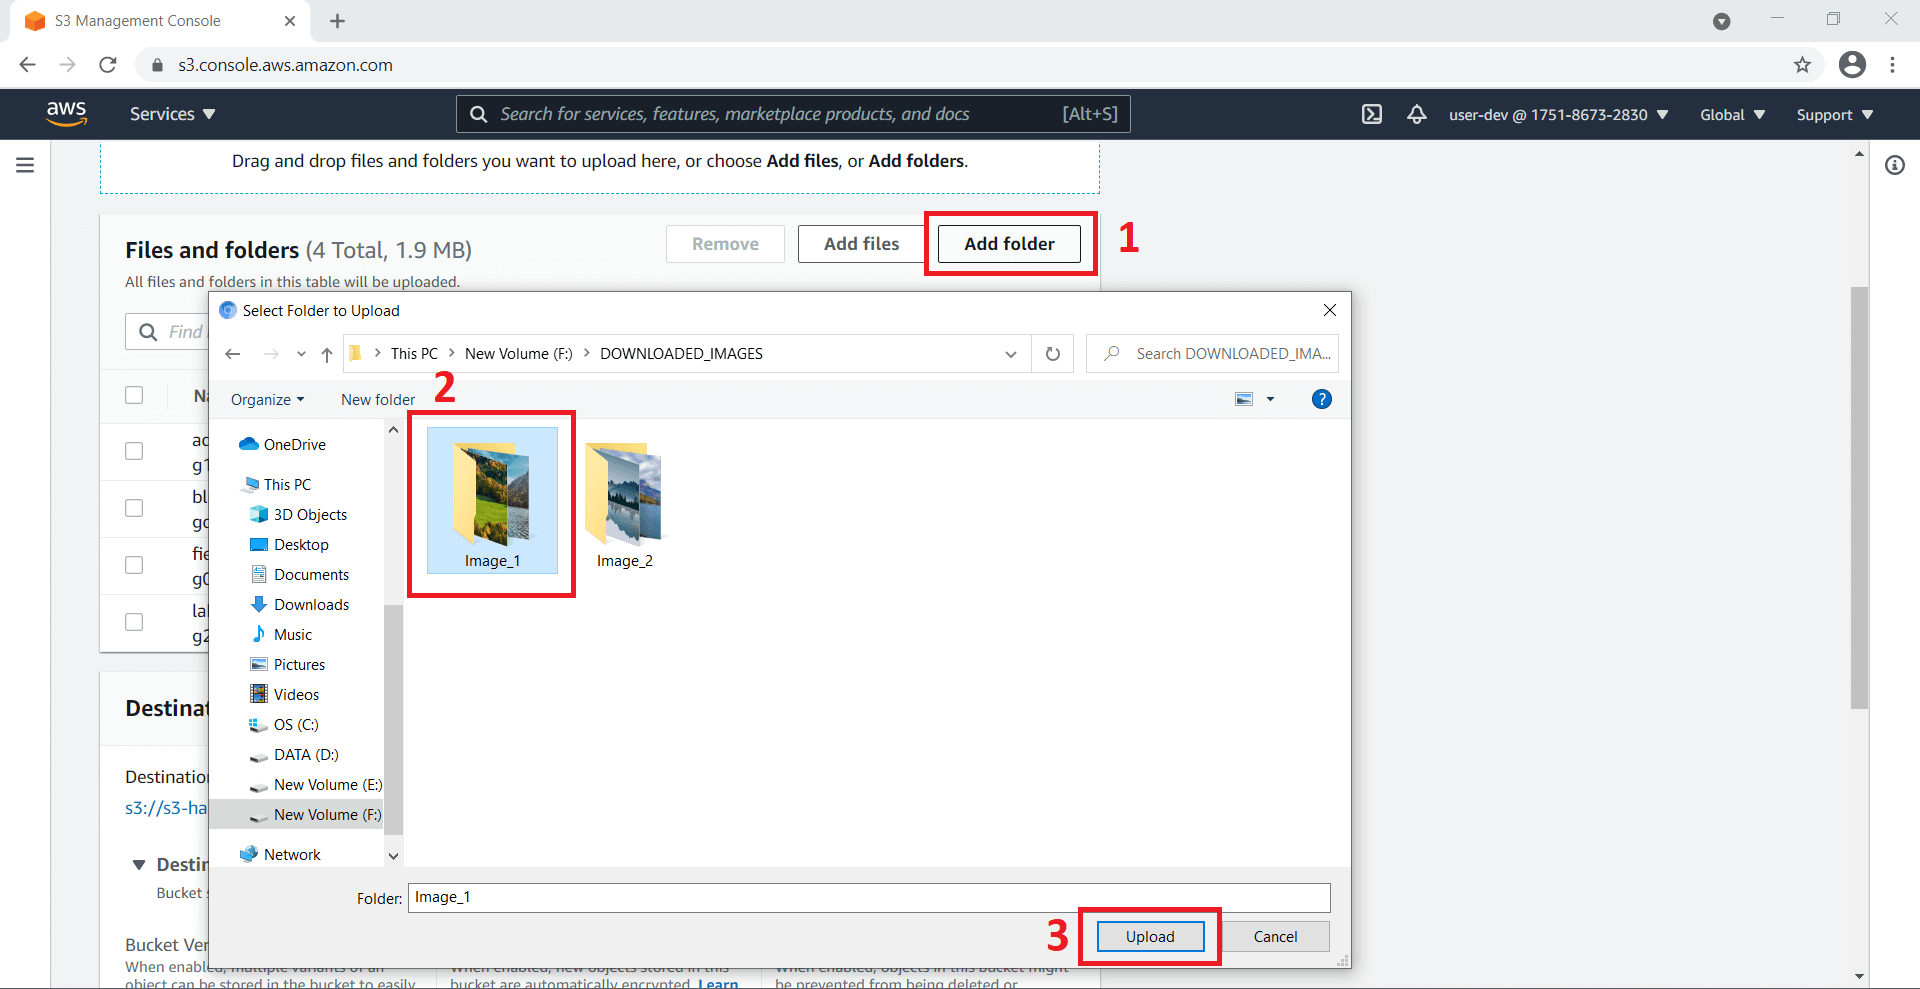
Step 5: For uploading the folder. Click on Add folder button. The upload window will open select folder which you need to upload. Click on the Upload button.
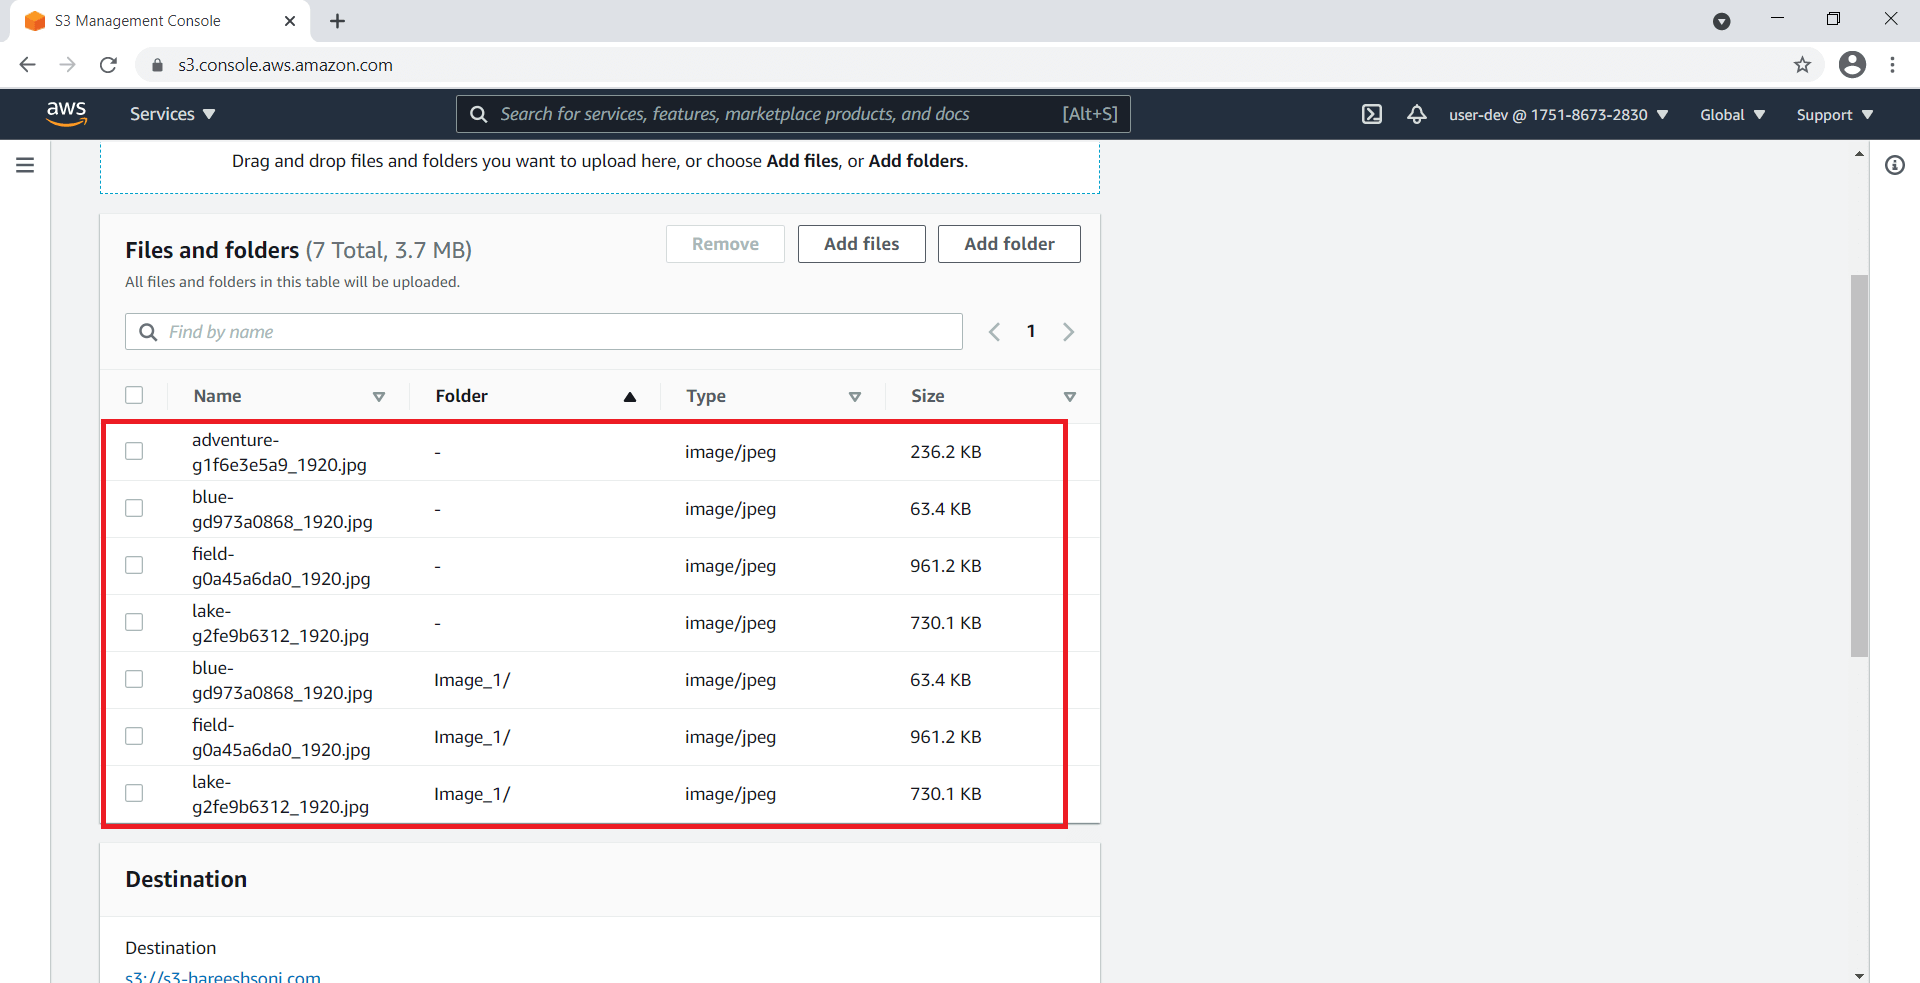
Step 6: Selected files name will display.
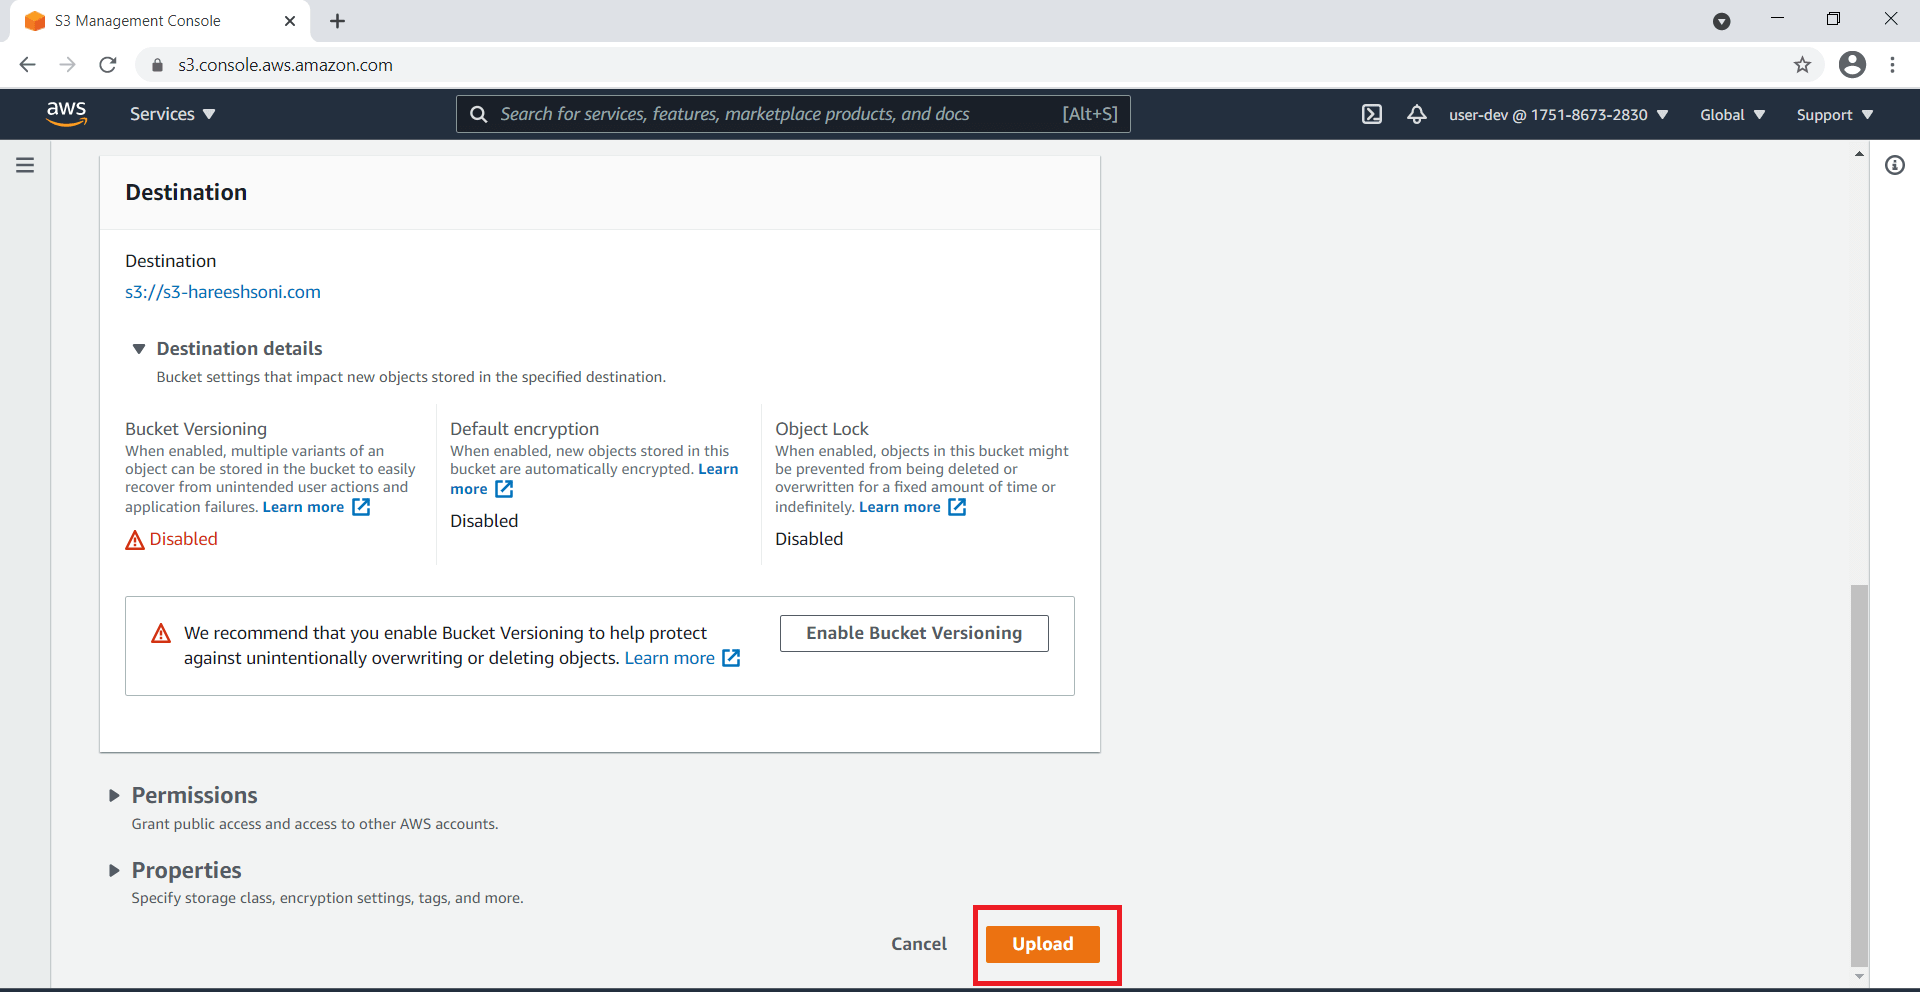
Step 7: Click on the Upload button.
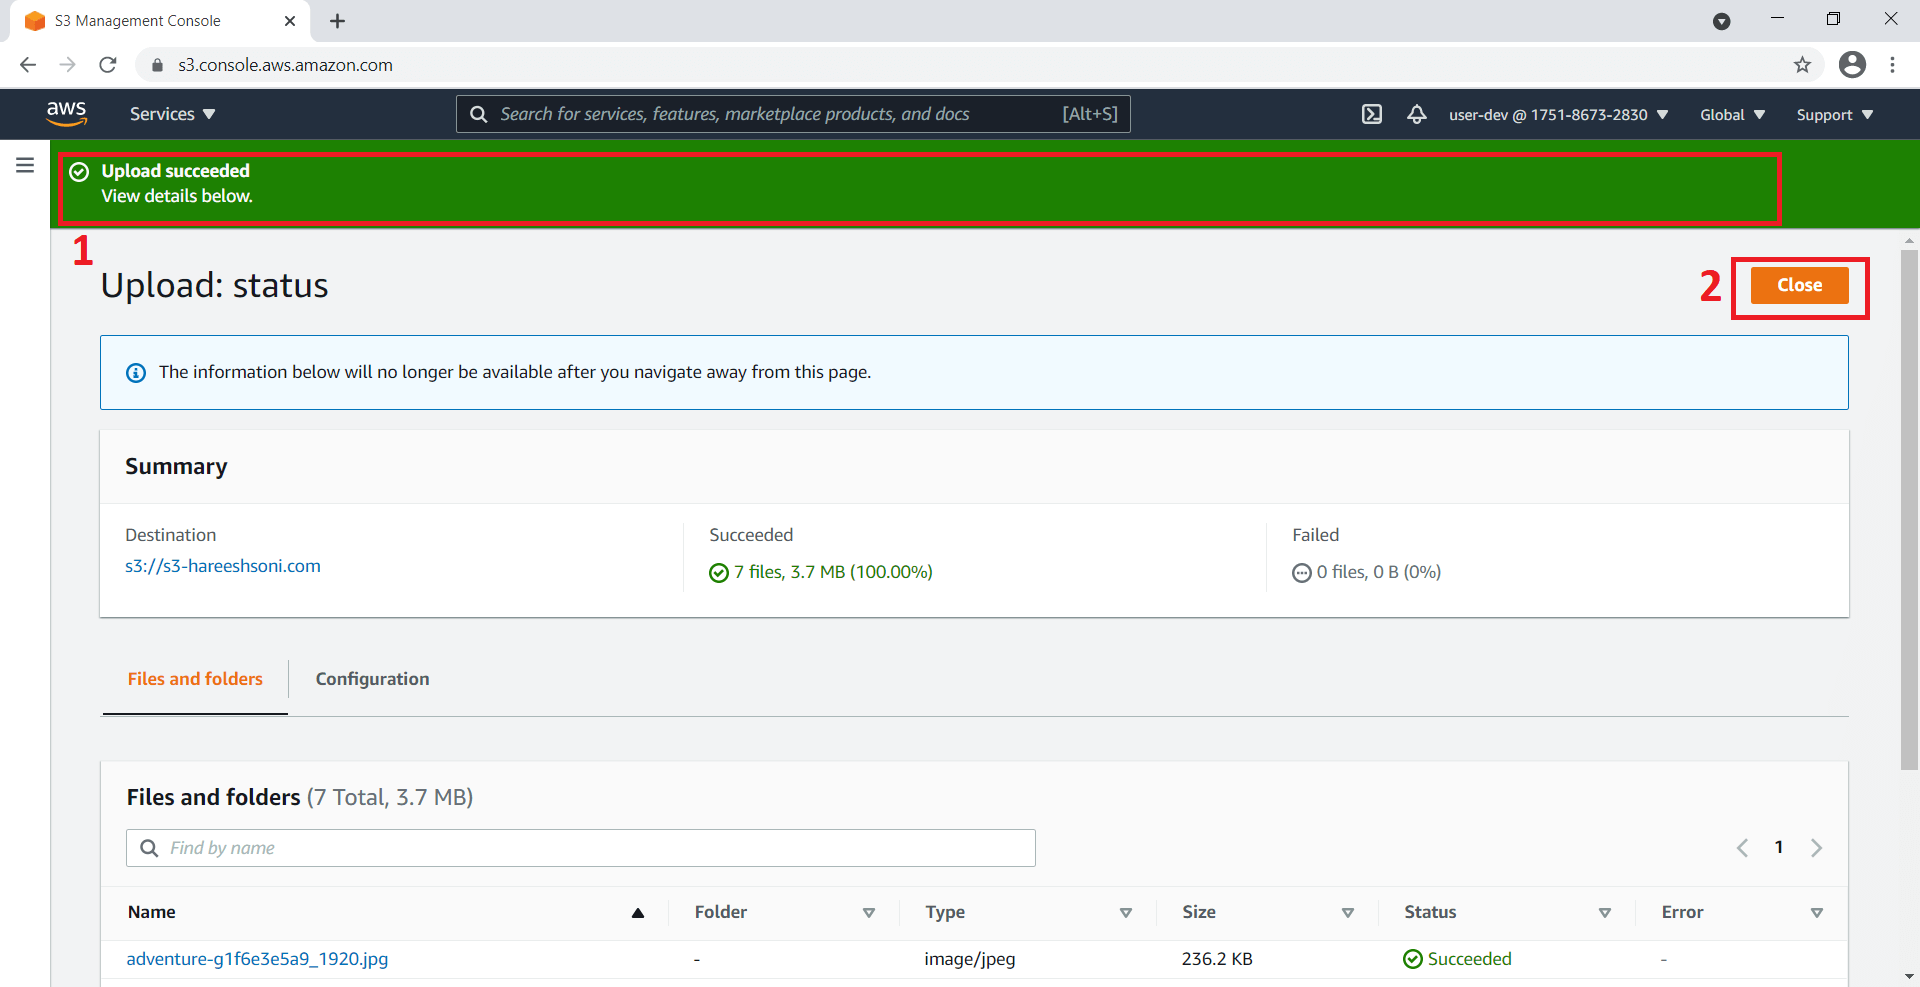
Step 8: Now you can see an upload success message. Click on the close button.
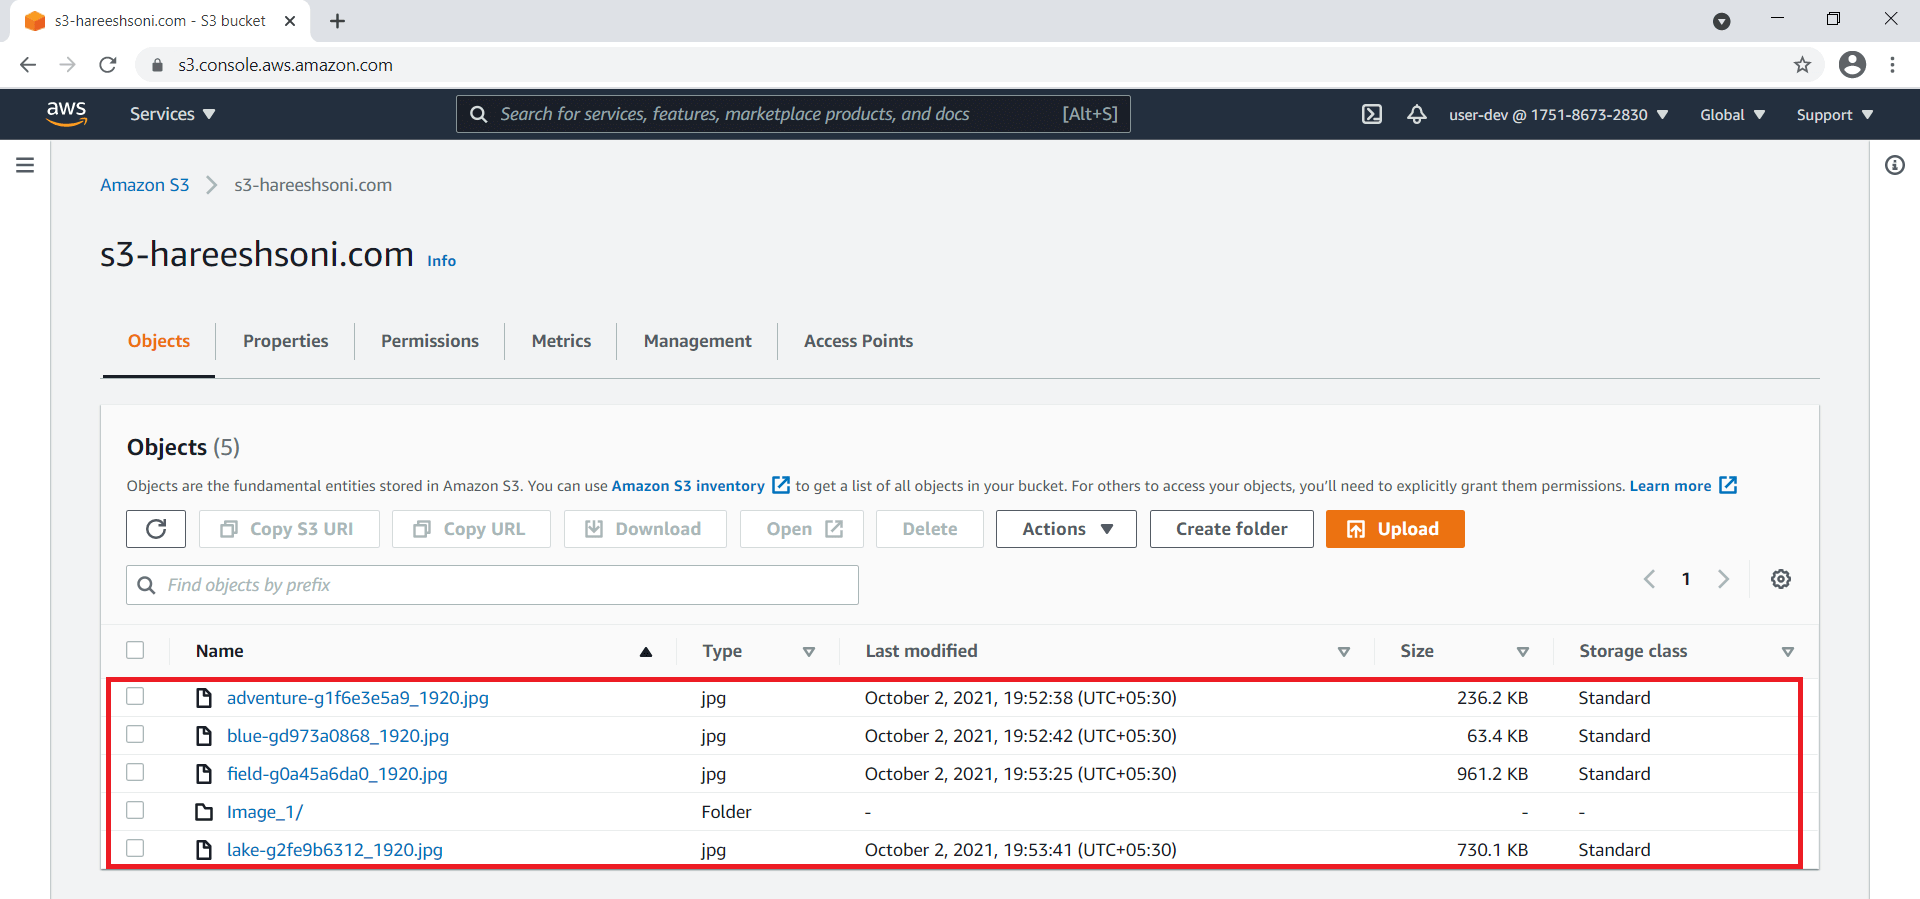
Step 9: Now you can see uploaded files is present inside a bucket.
View files in AWS S3
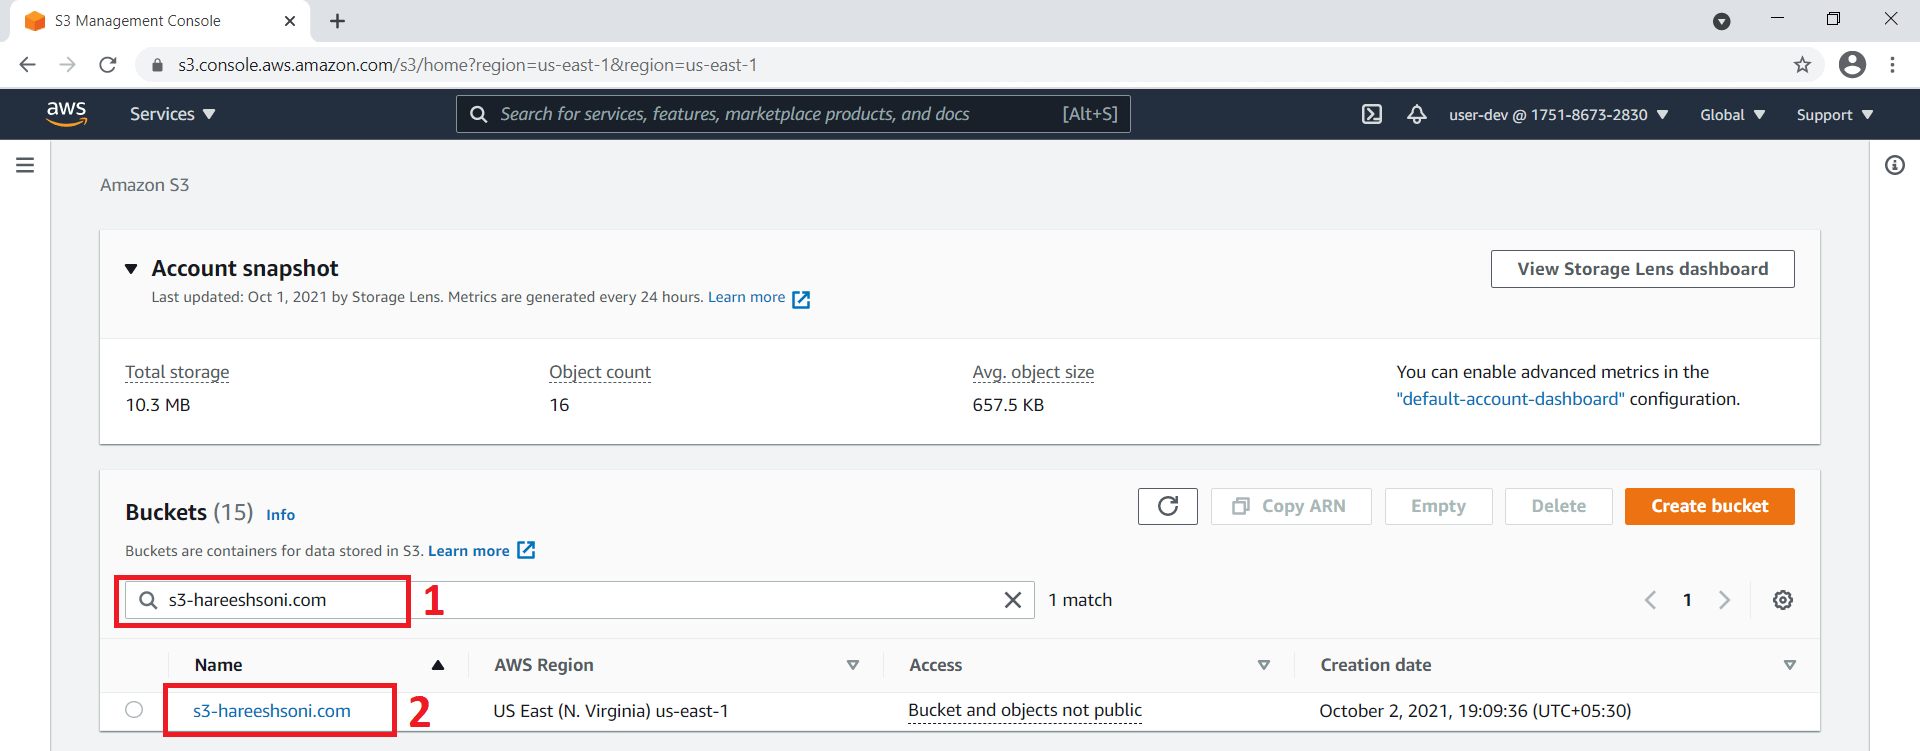
Step 1: Search bucket using bucket name. Click on bucket name.
Step 2: Click on the permissions tab. Click on the Edit button.
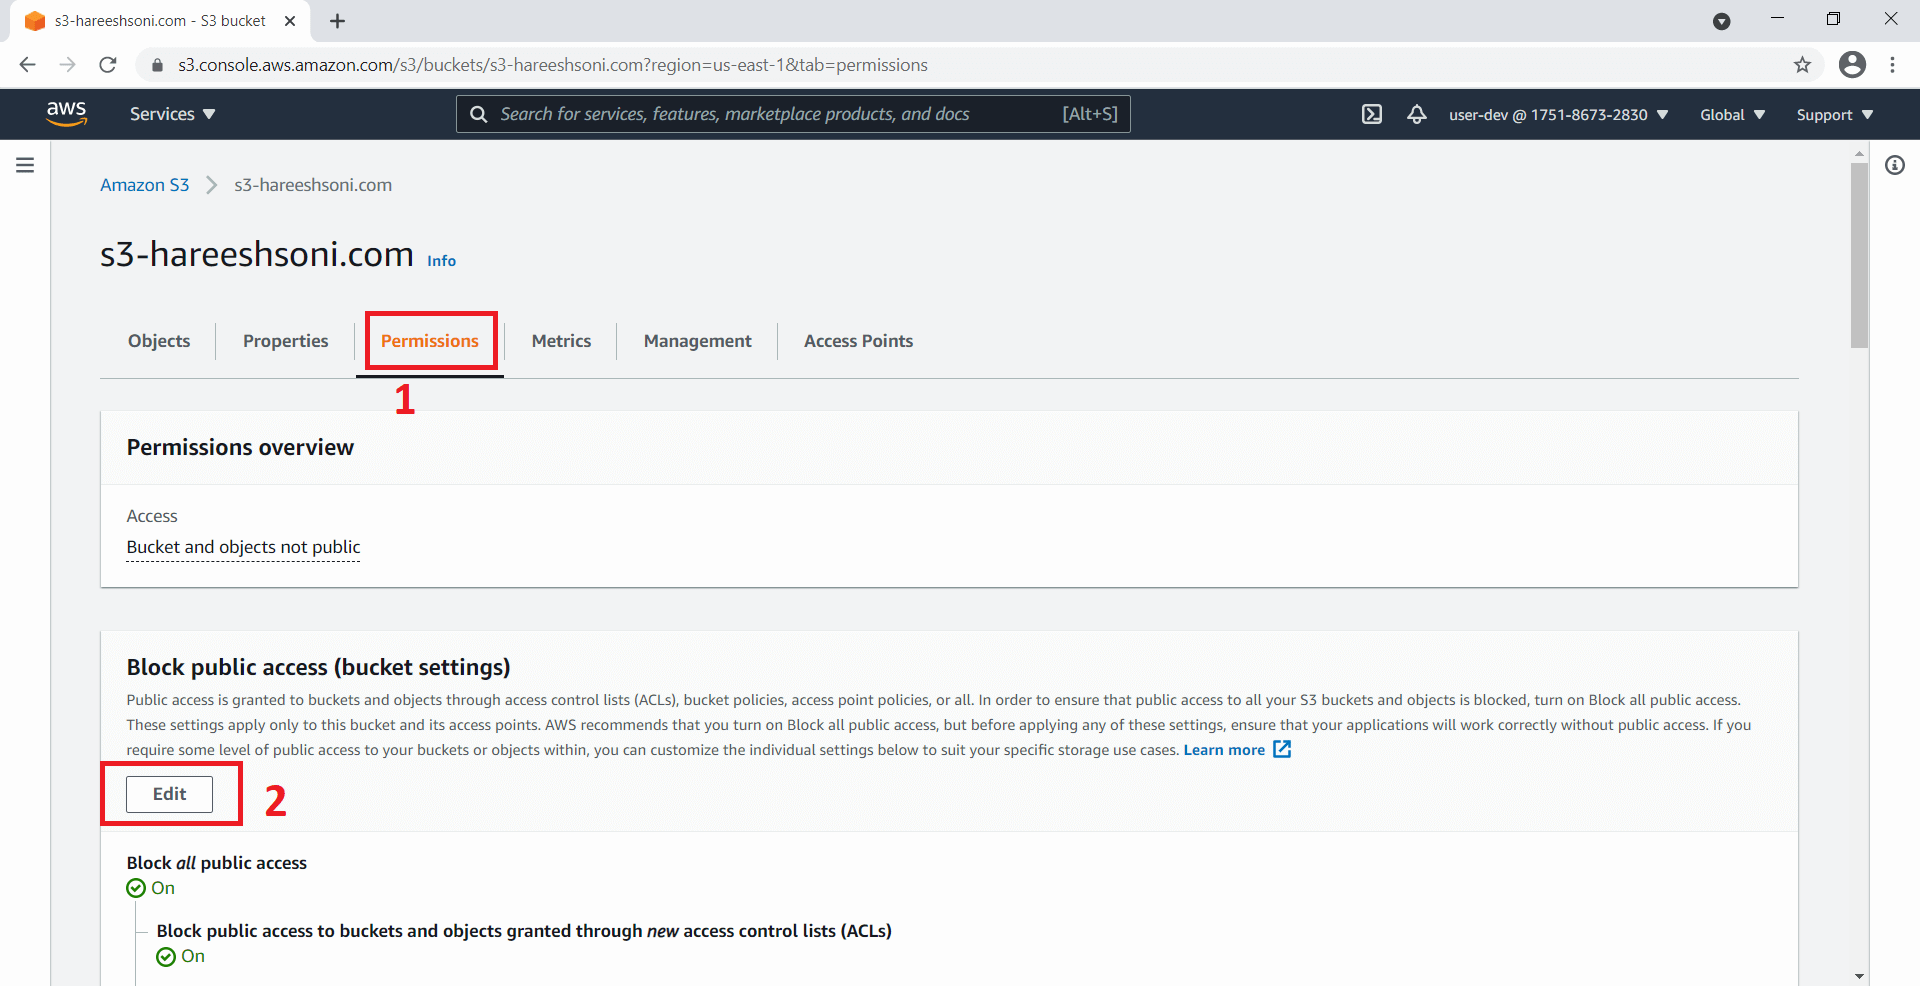
Step 3: Uncheck Block all public access Checkbox. Click on the Save changes button.
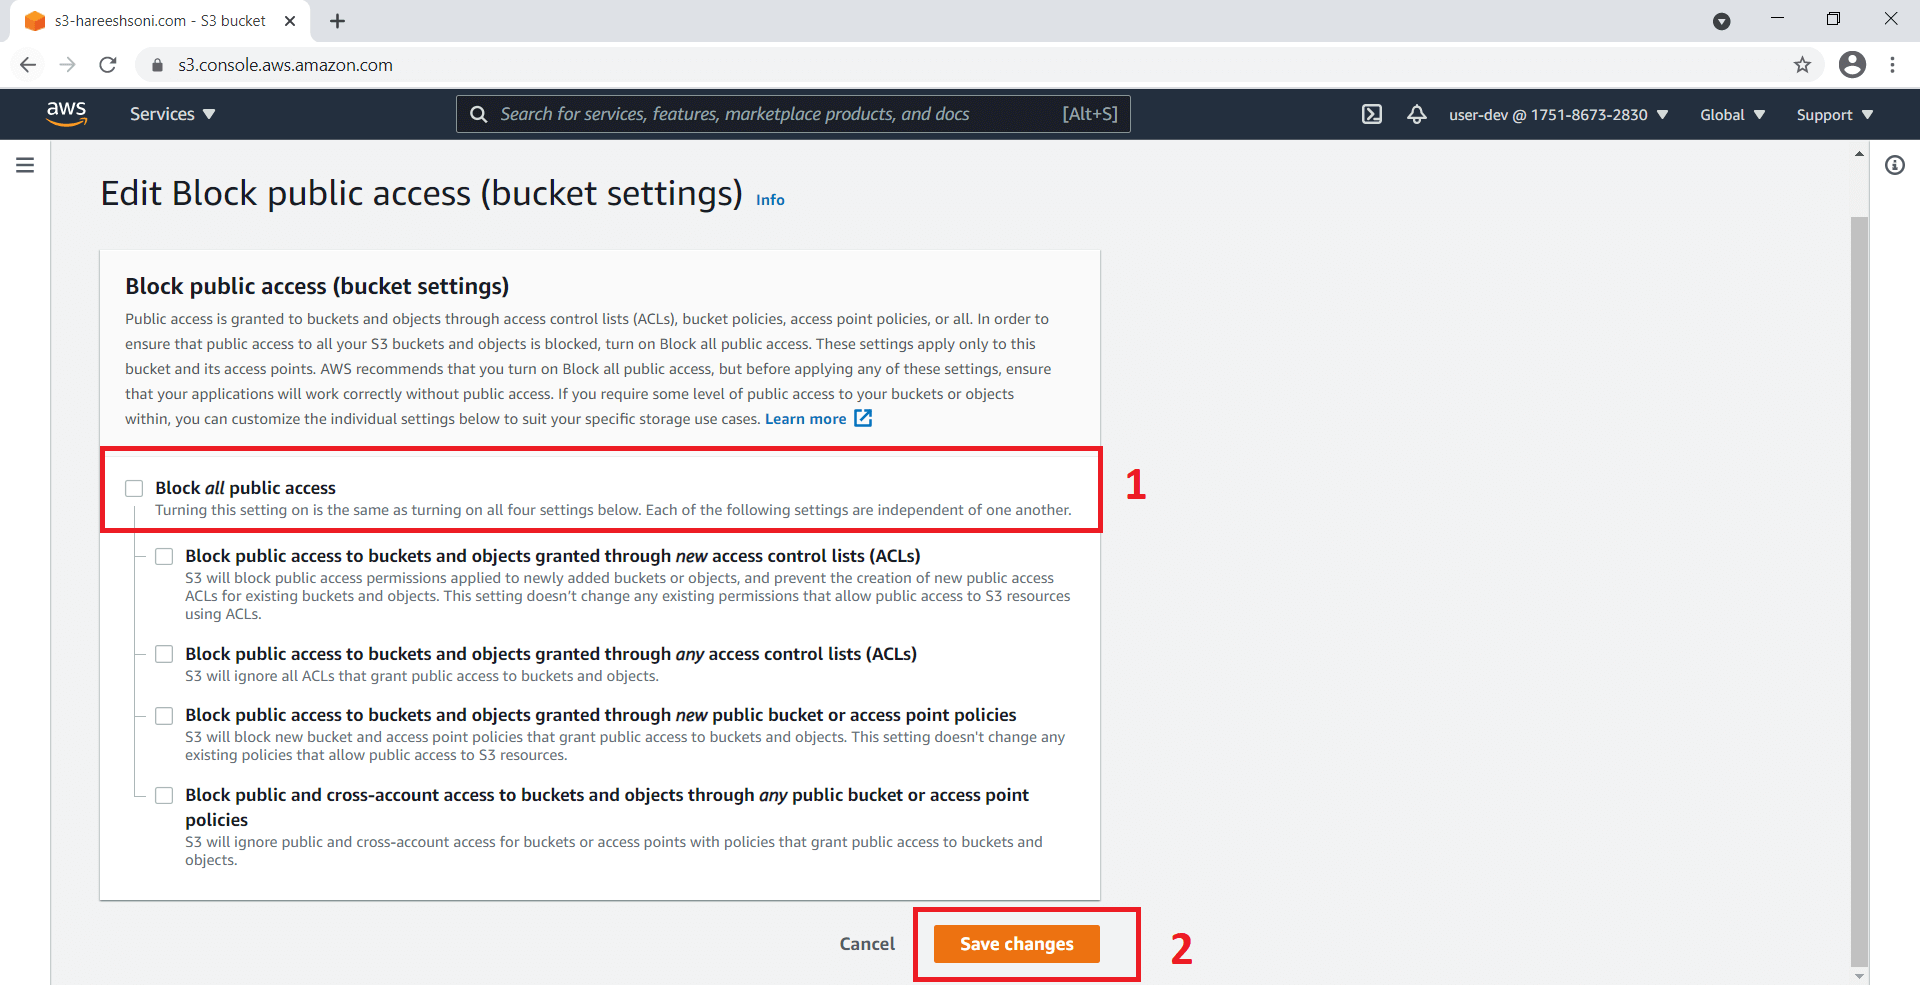
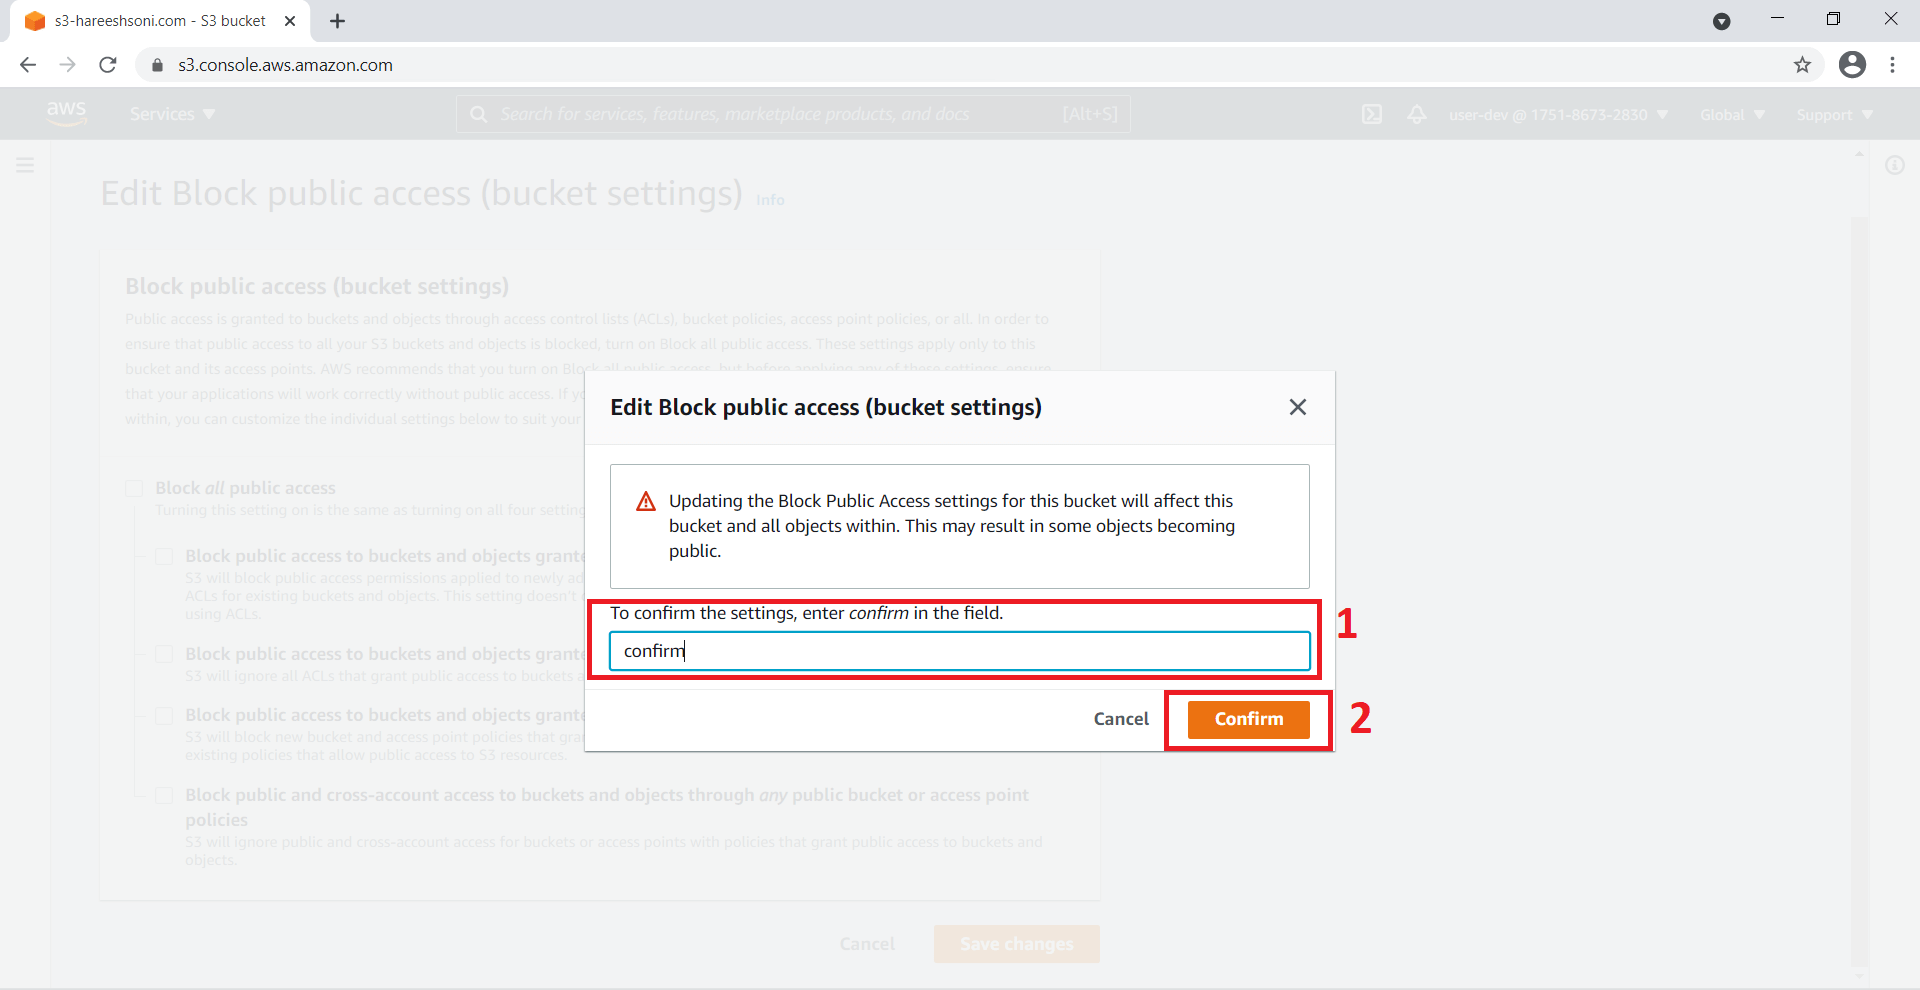
Step 4: Edit Block public access (bucket settings) pop-up window will open. Confirm the settings. Click on Confirm button.
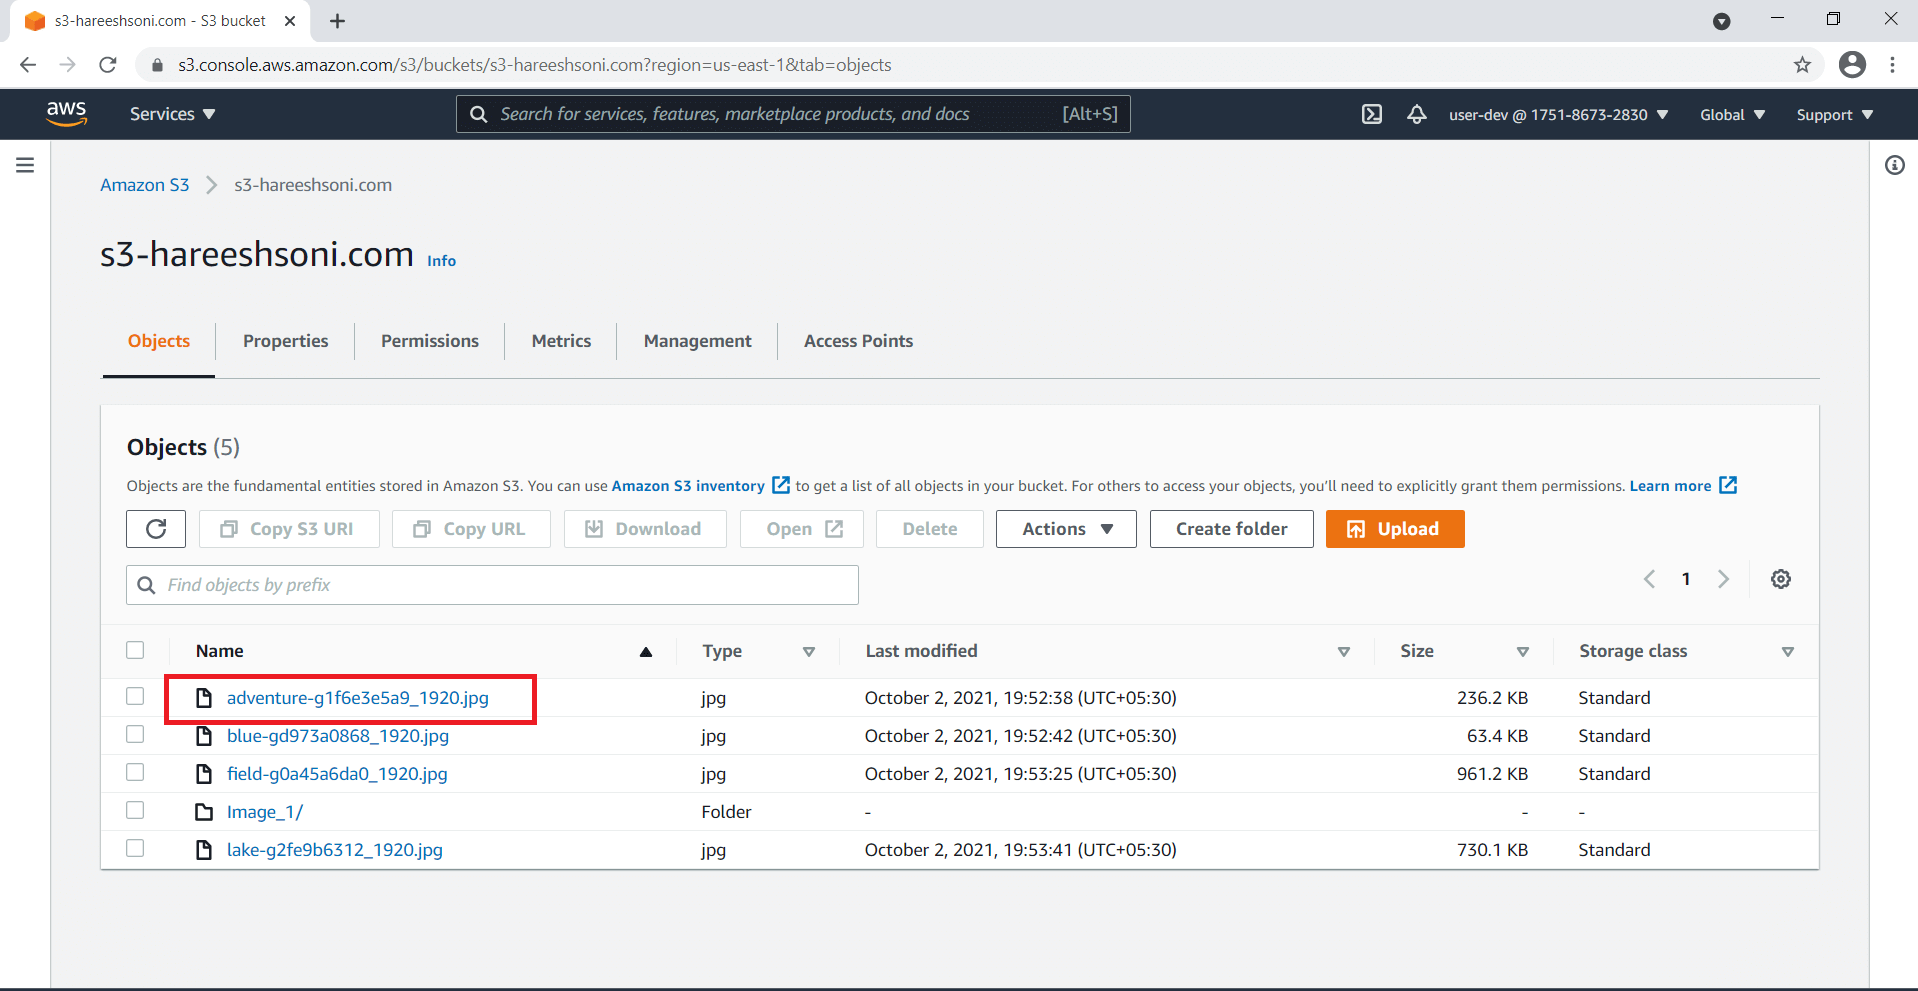
Step 5: Again, Search bucket using bucket name. Click on bucket name.

Step 6: Click on the file name.
Step 7: Click on Object URL.
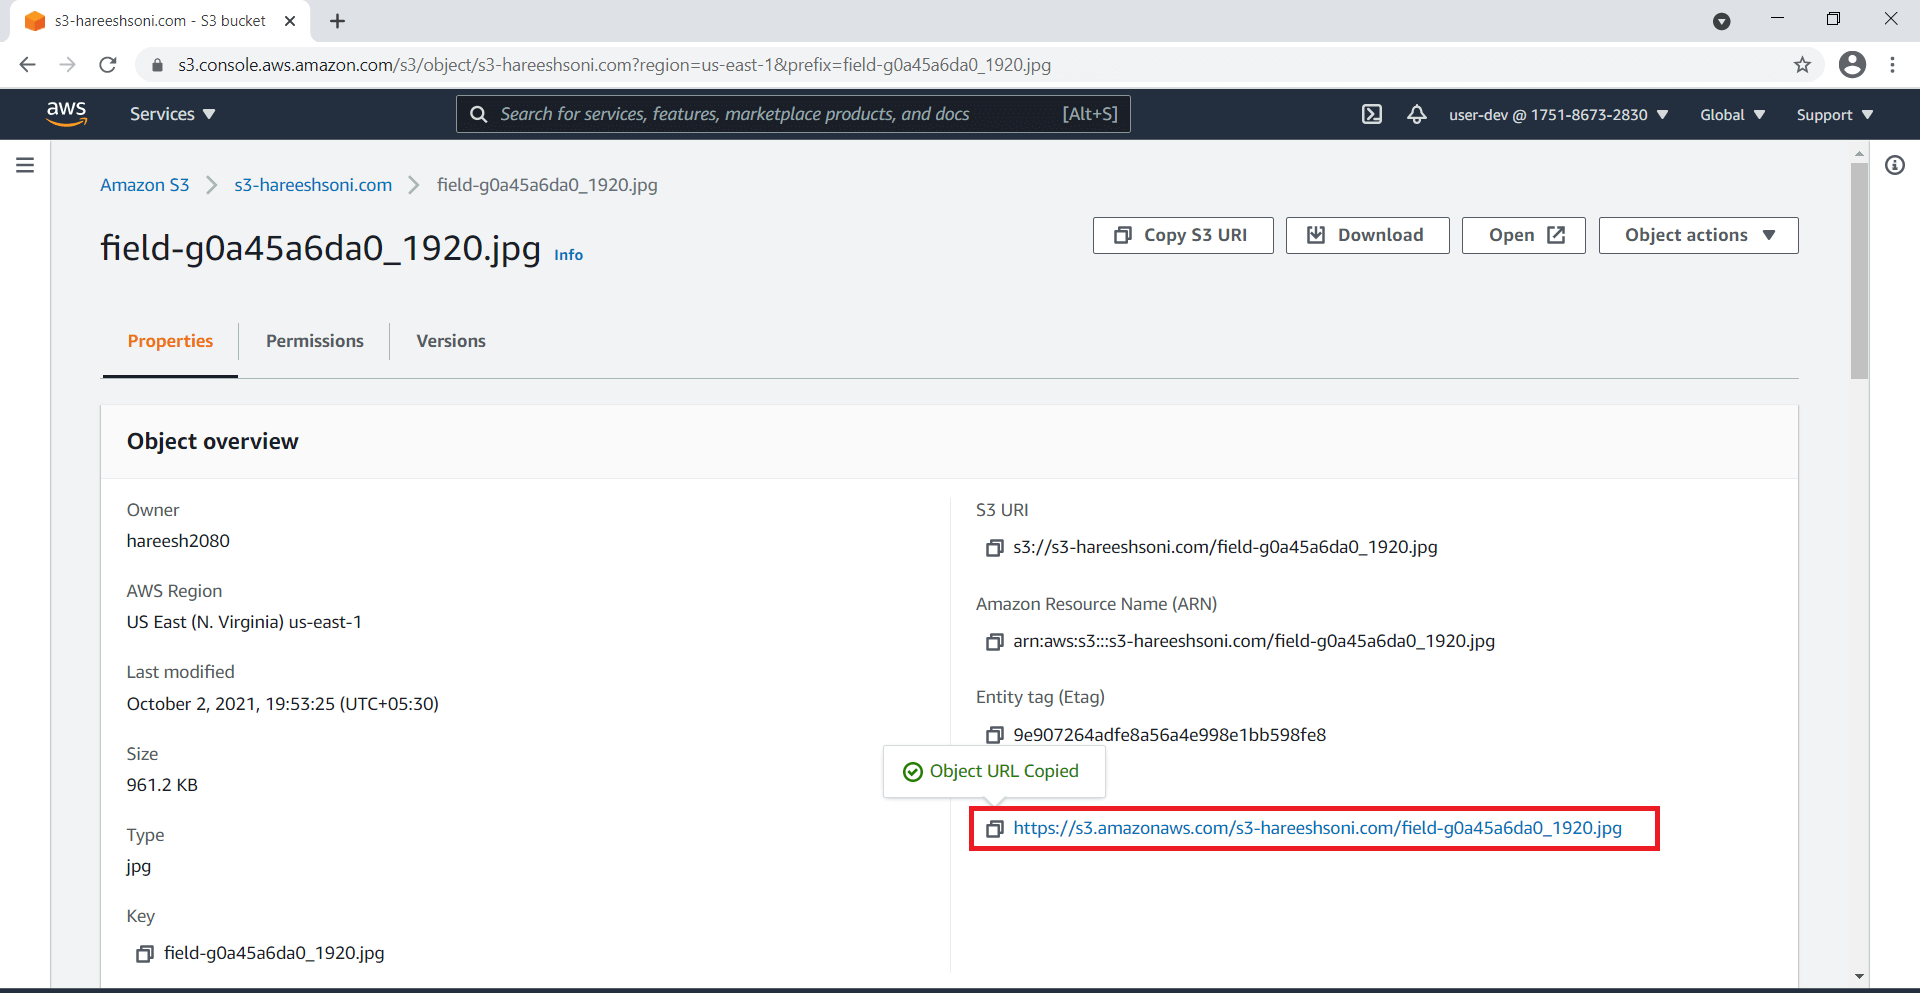
Step 8: If you see the AccessDenied Error code. Follow step 9 and step 10.

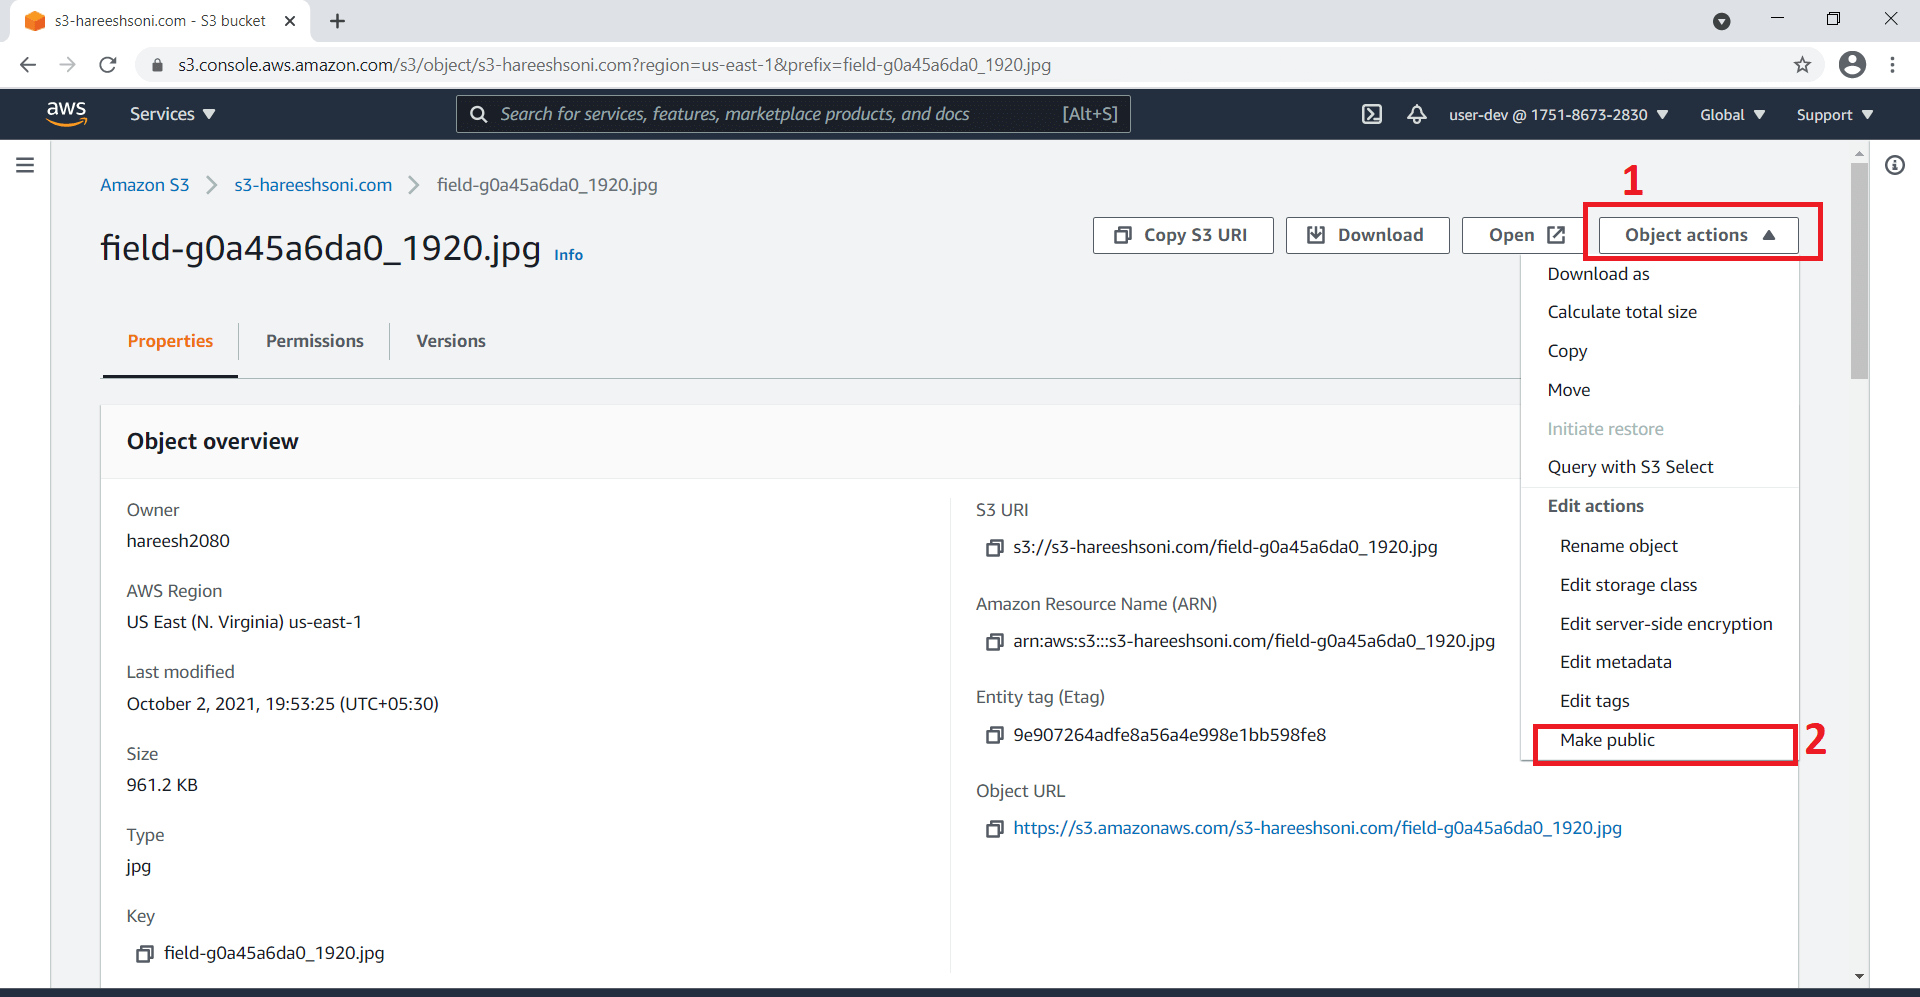
Step 9: Click on Object actions. Click on the Make public button.
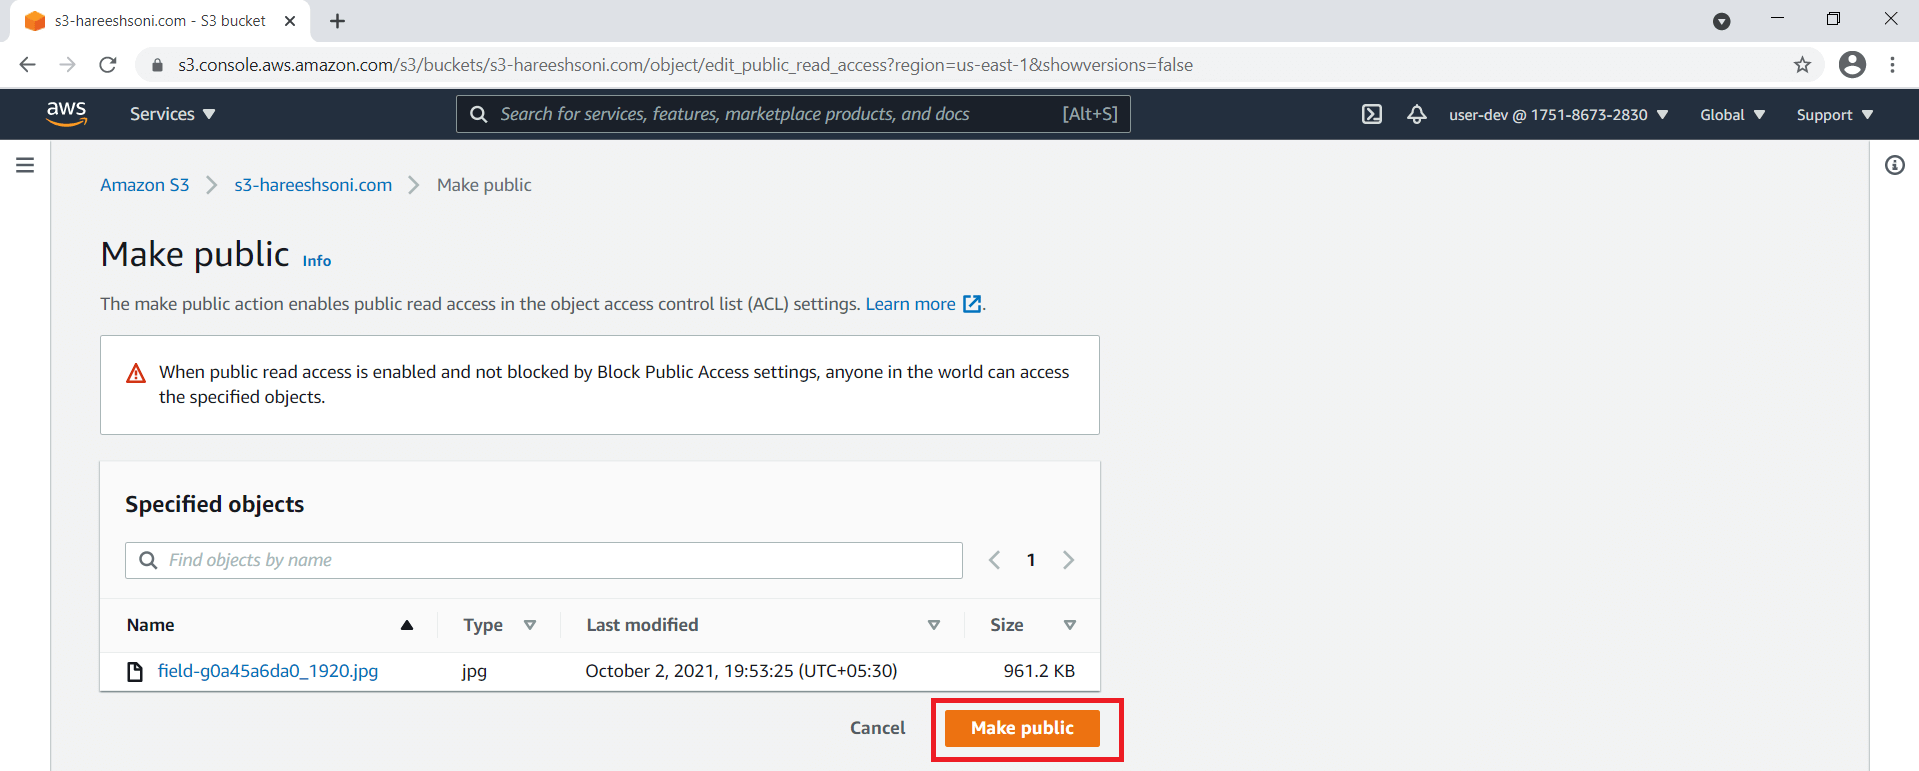
Step 10: Click on the Make public button.
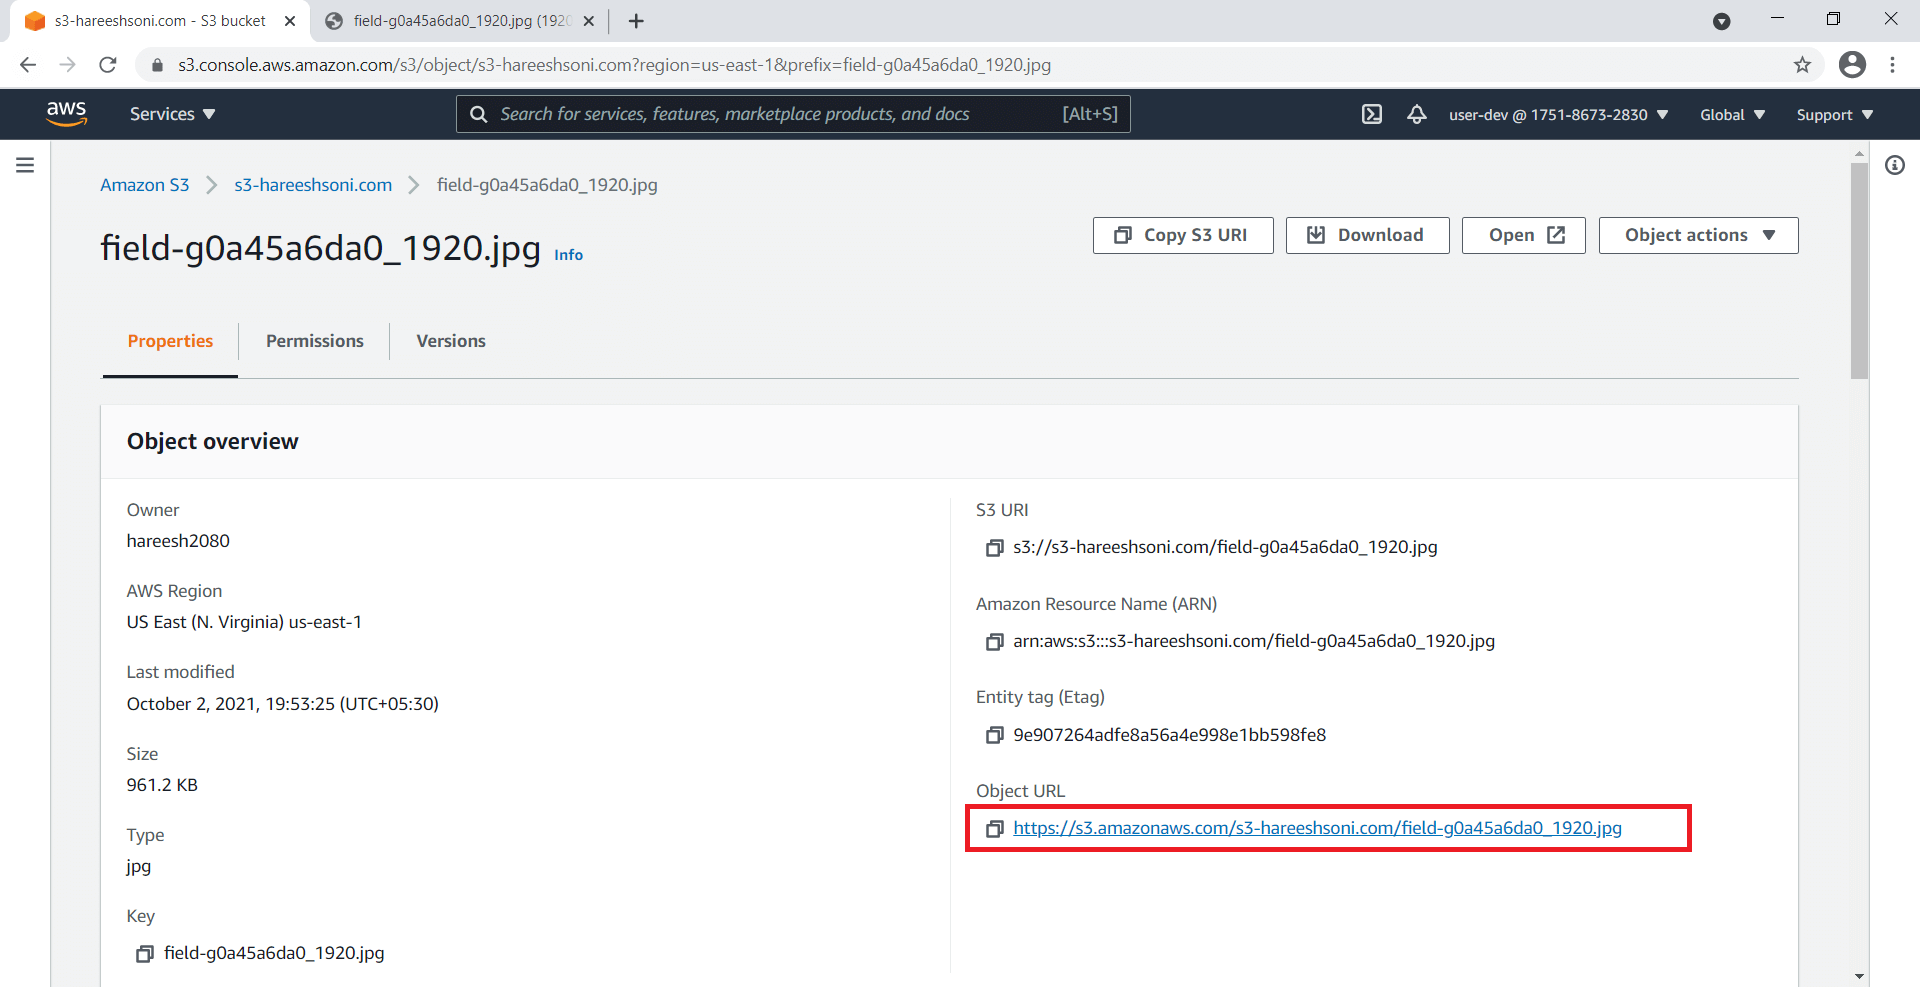
Step 11: Click on Object URL.
Step 12: Now you can see the object.
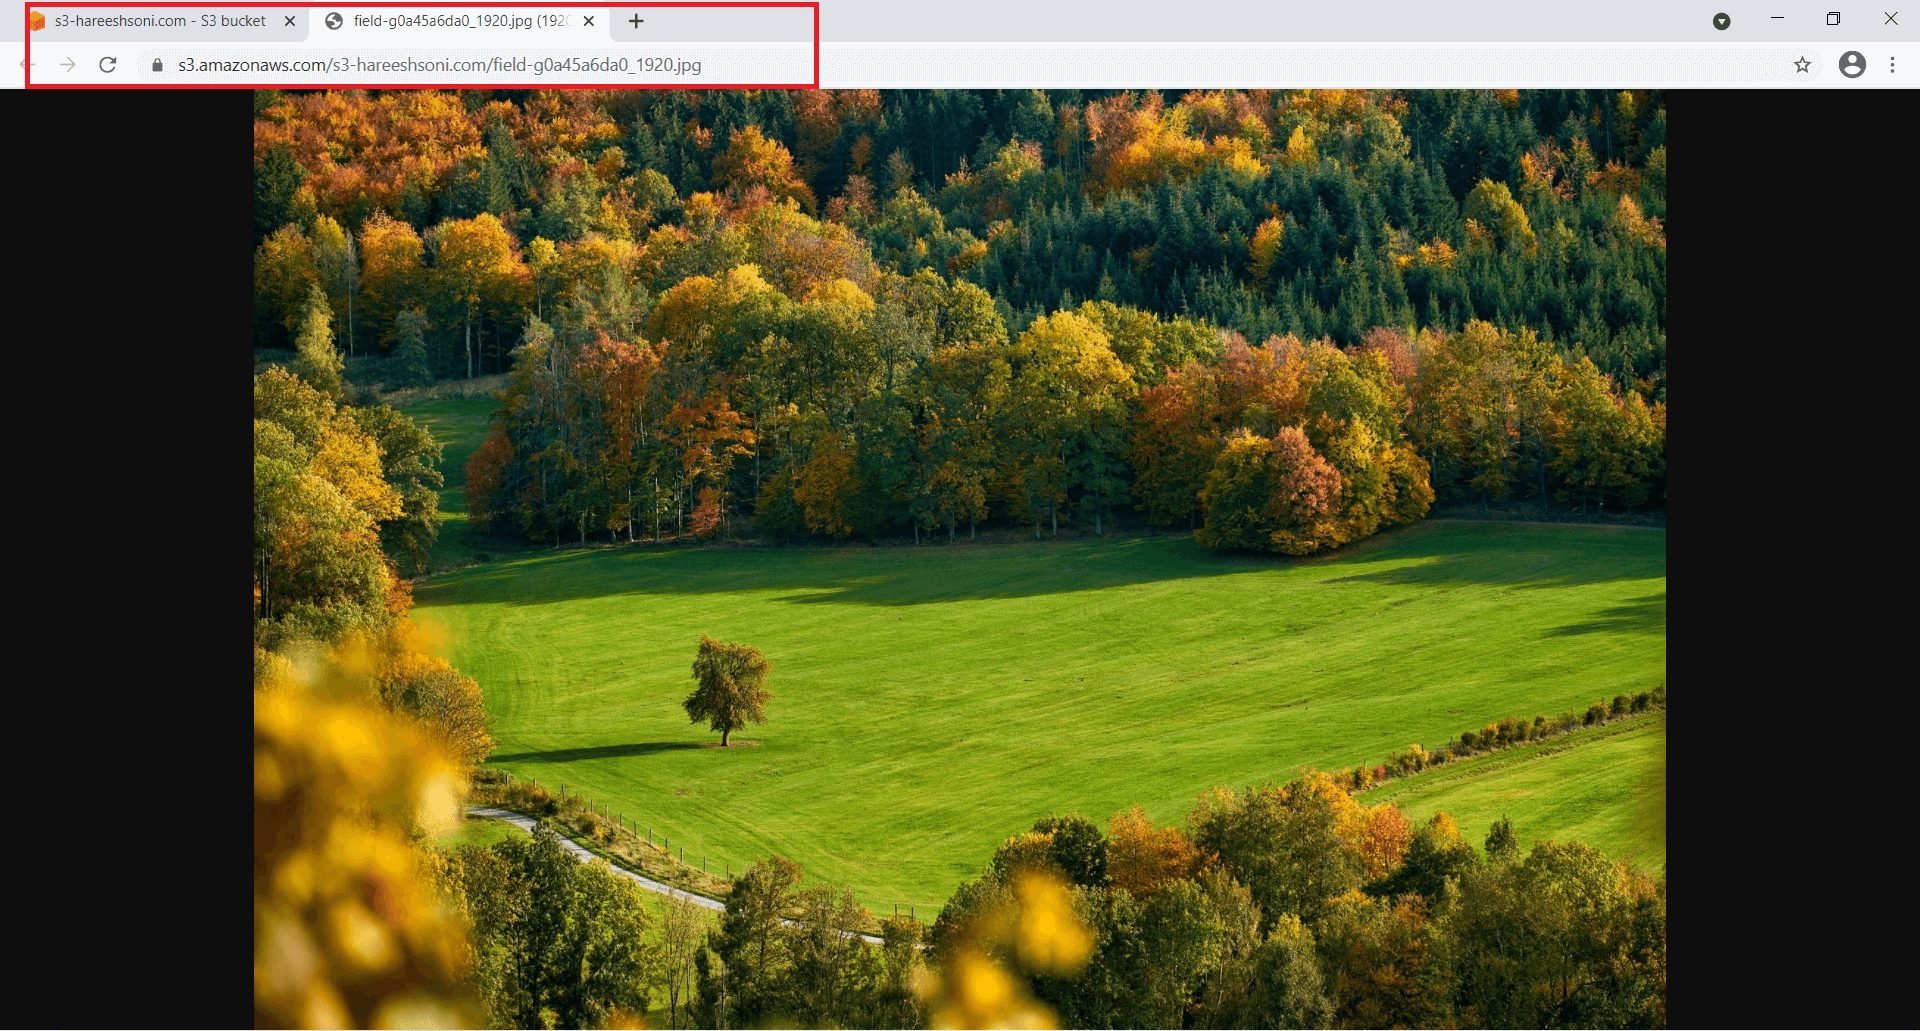
Static website hosting in AWS S3
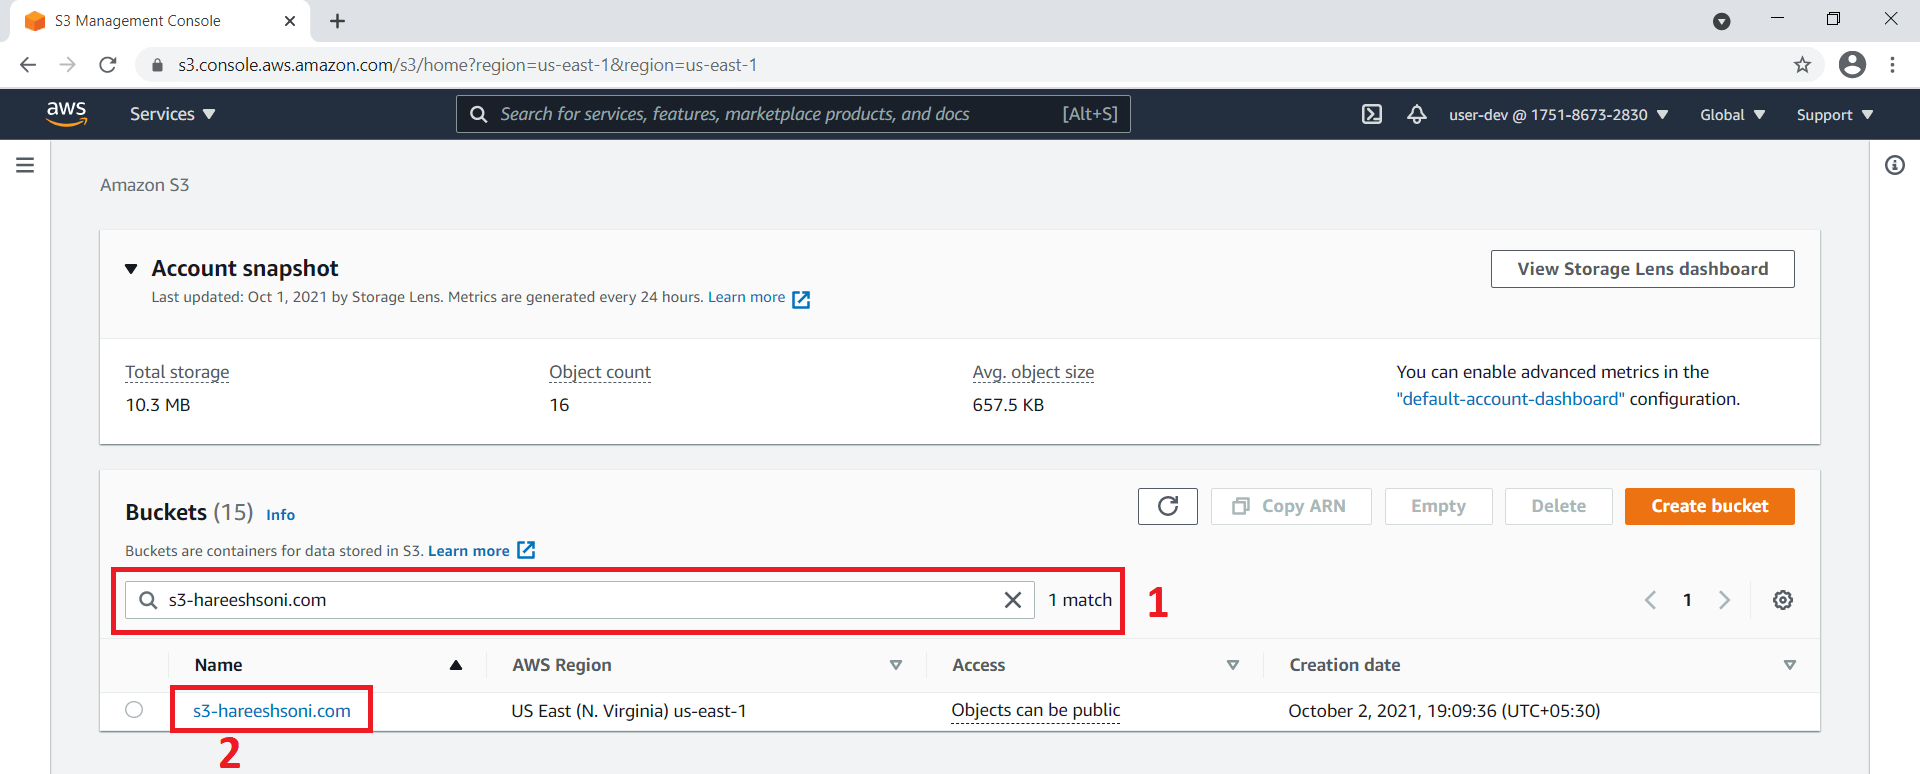
Step 1: Search bucket using bucket name. Click on bucket name.
Step 2: Create index.html and error.html files and upload these files in a bucket and make them public.
Note: error.html file is optional.
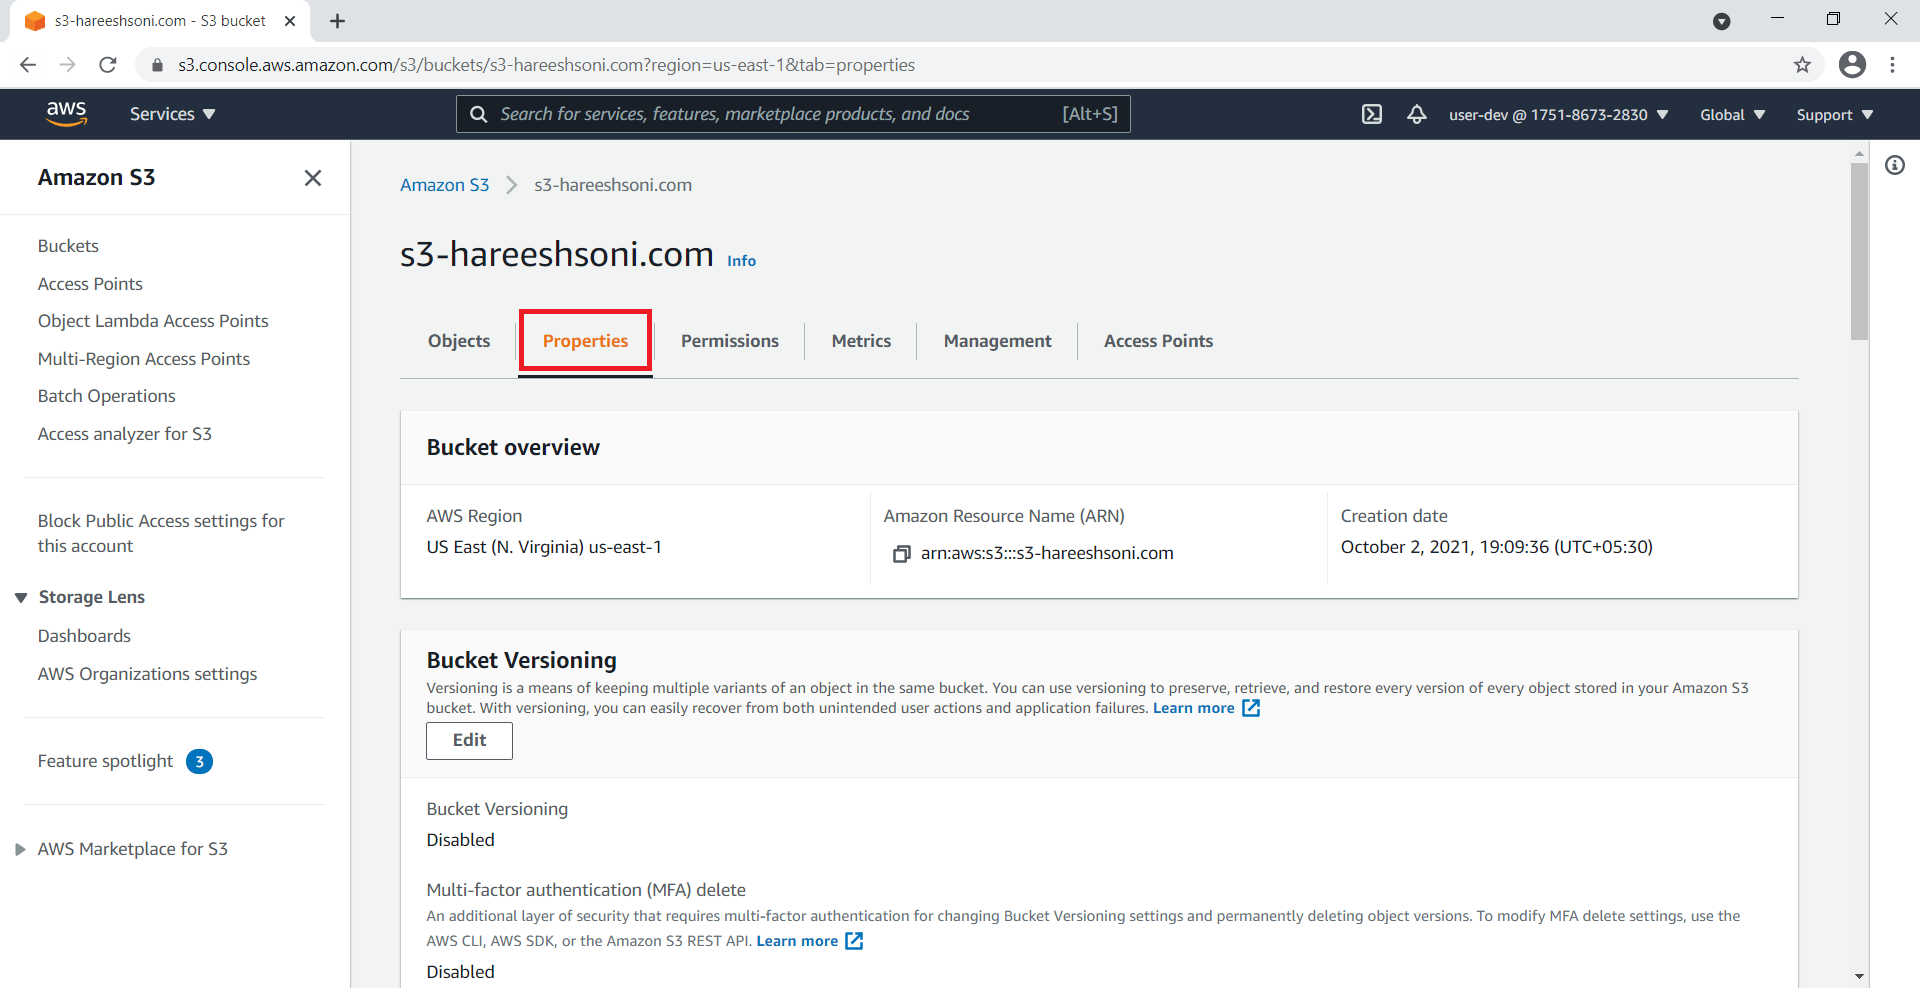
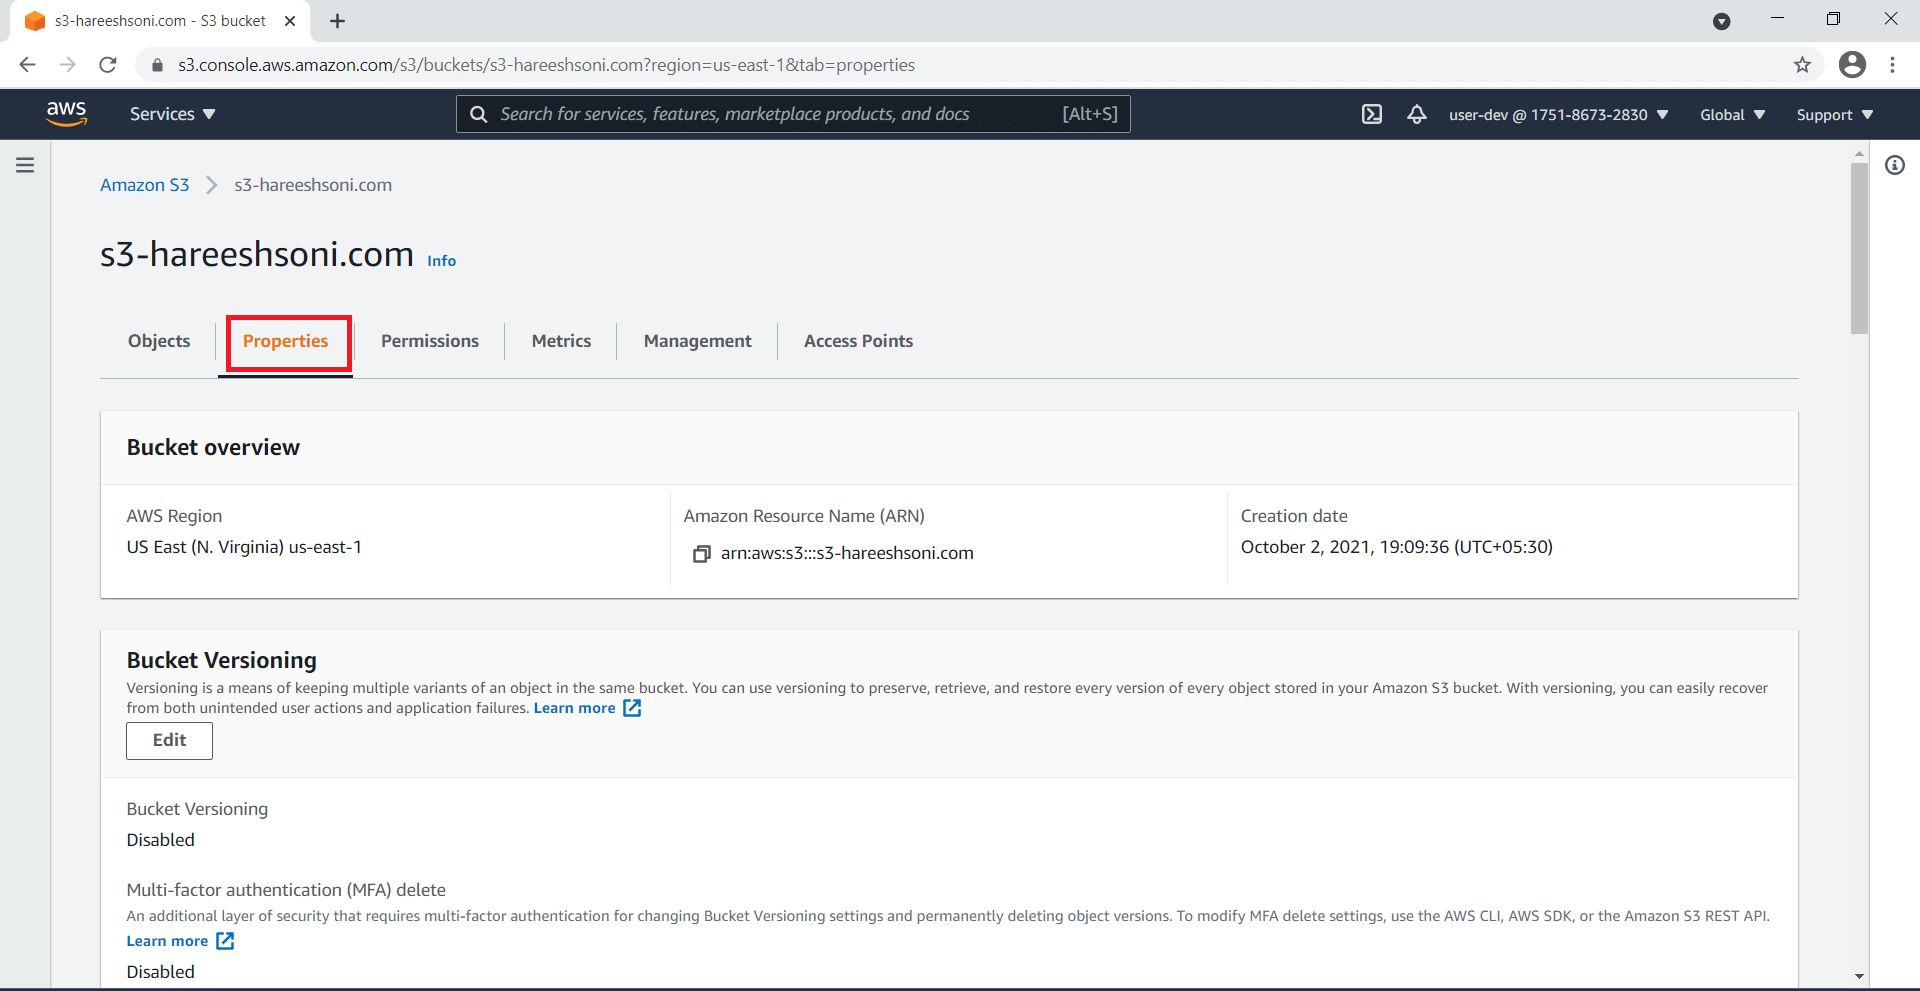
Step 3: Click on the Properties tab.
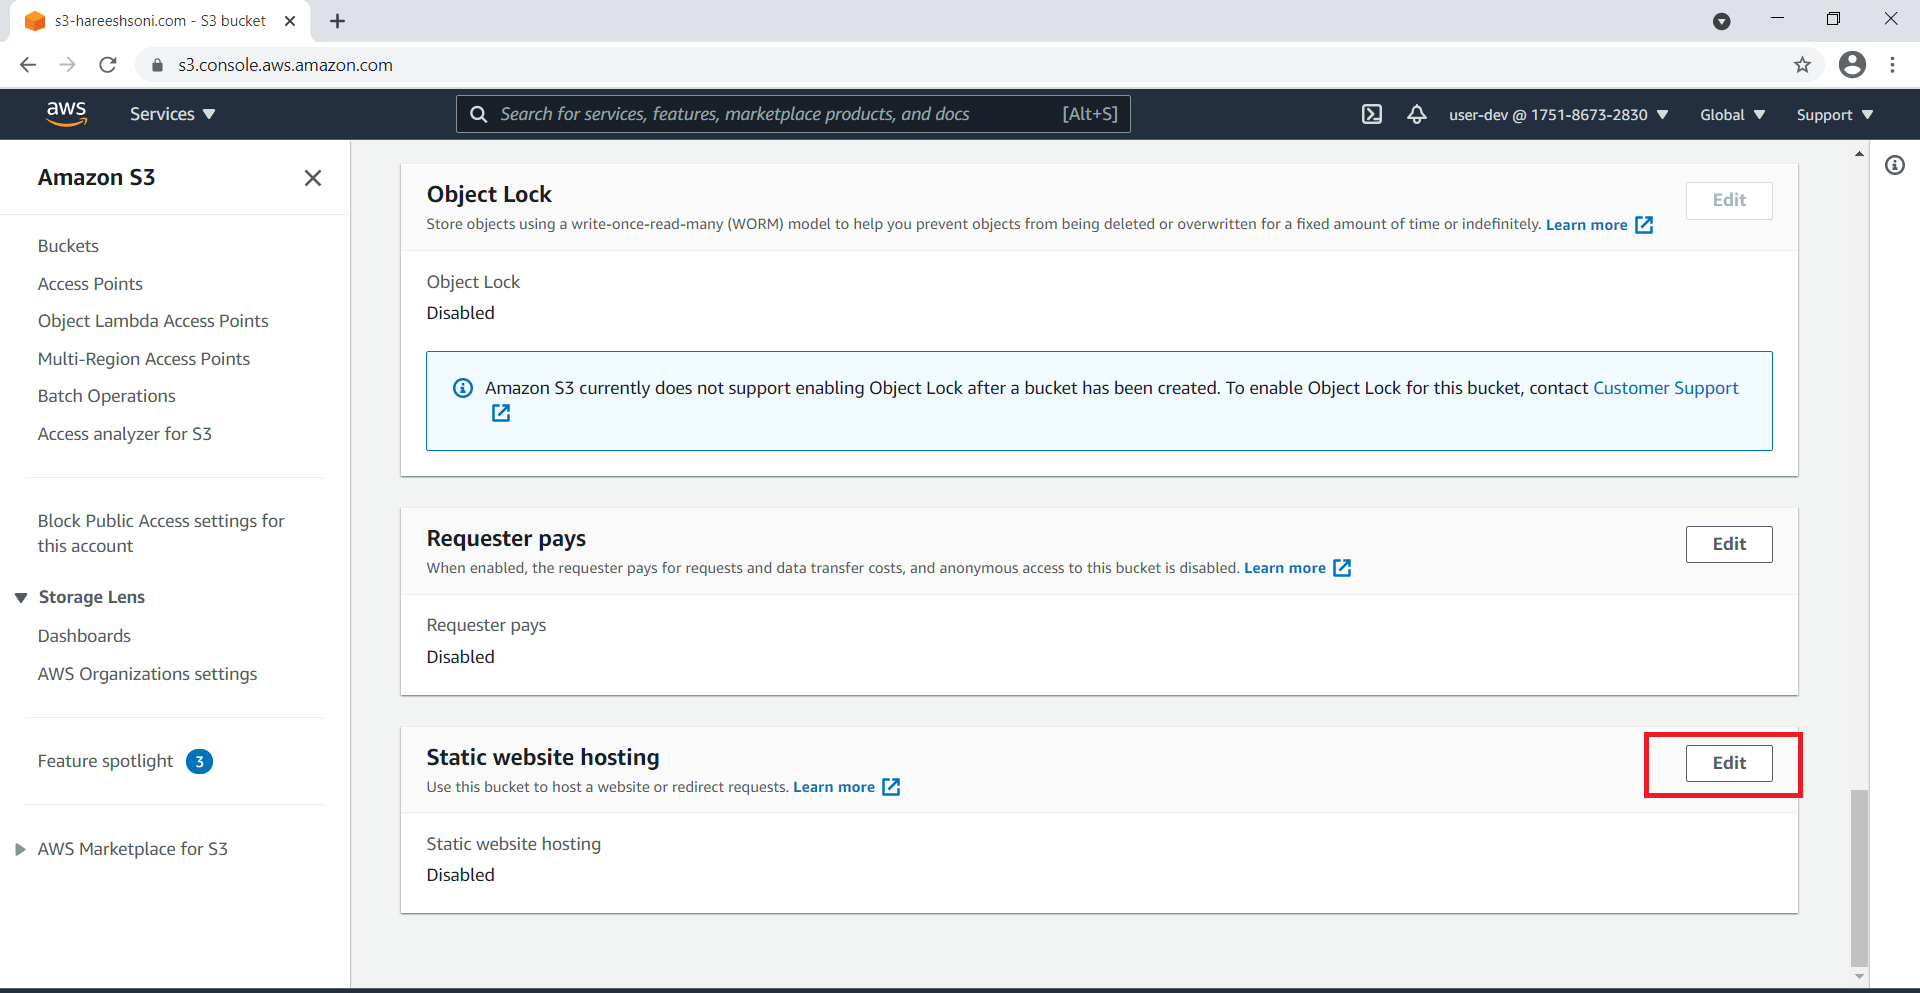
Step 4: Click on the Edit button. Under Static website hosting.
Step 5: Select Enable radio button. Provide index.html inside Index Document.
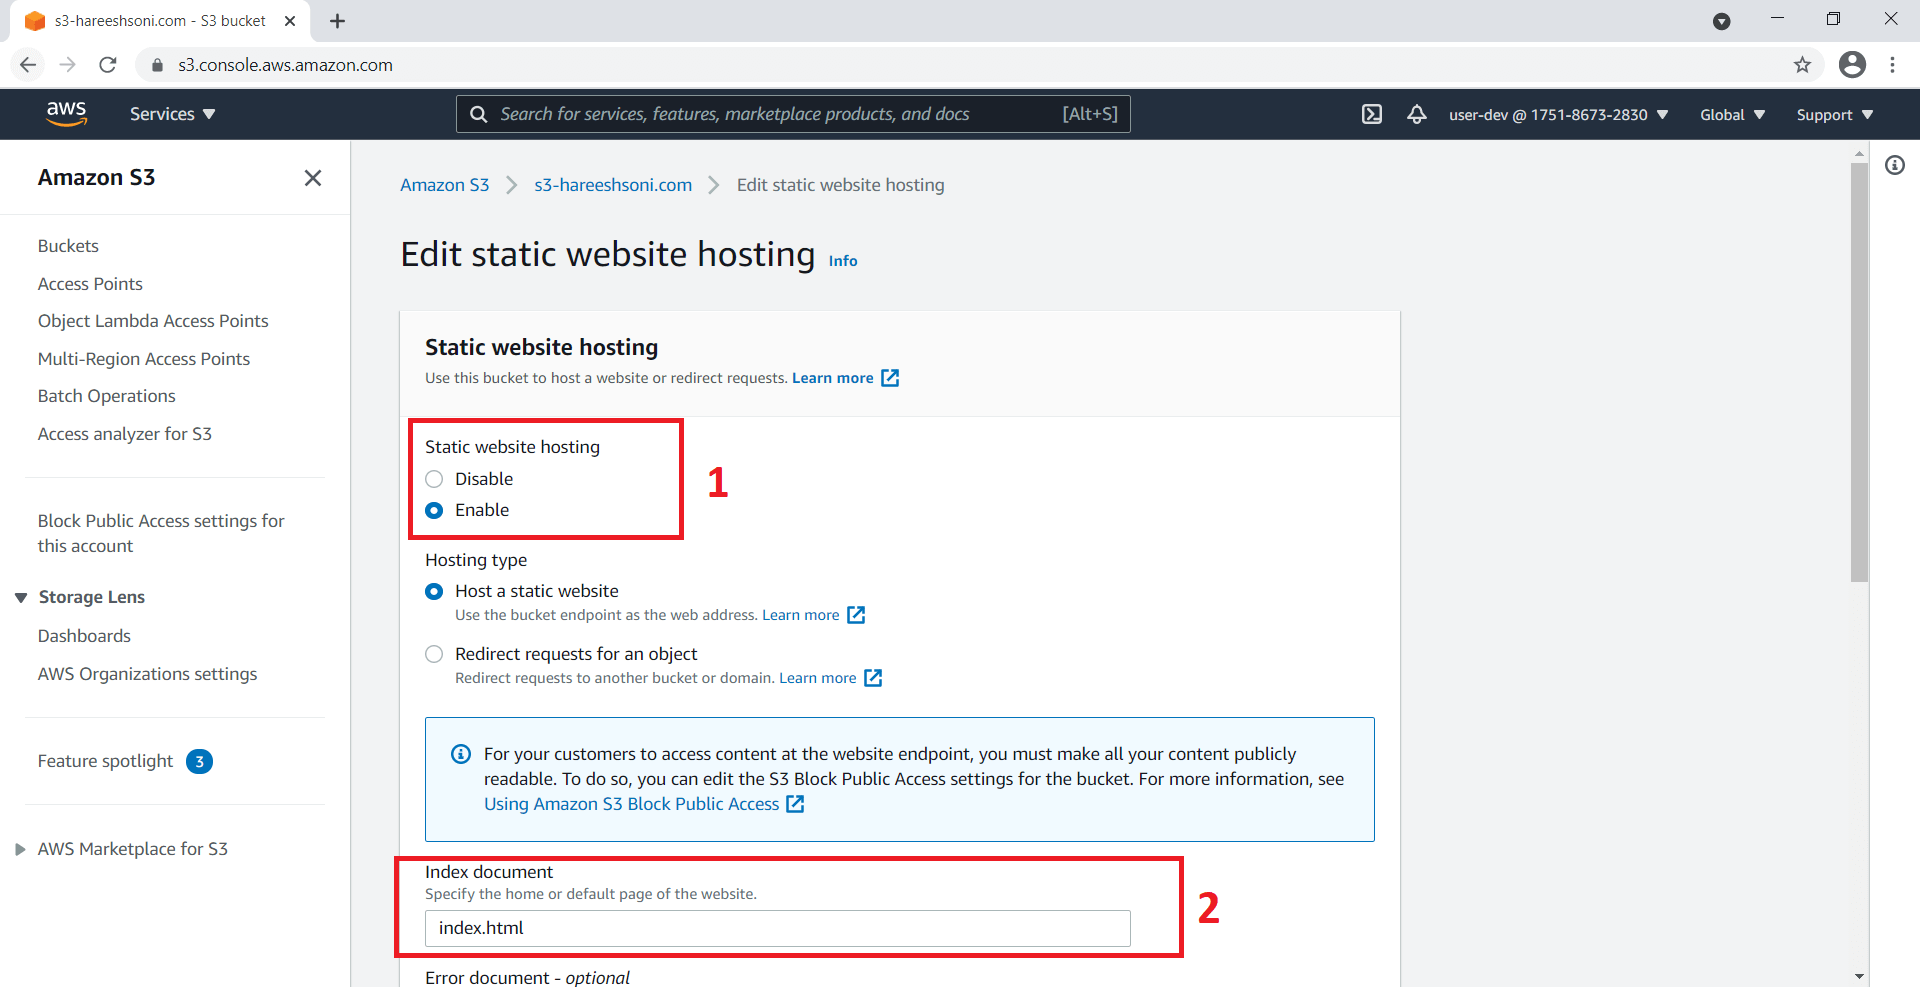
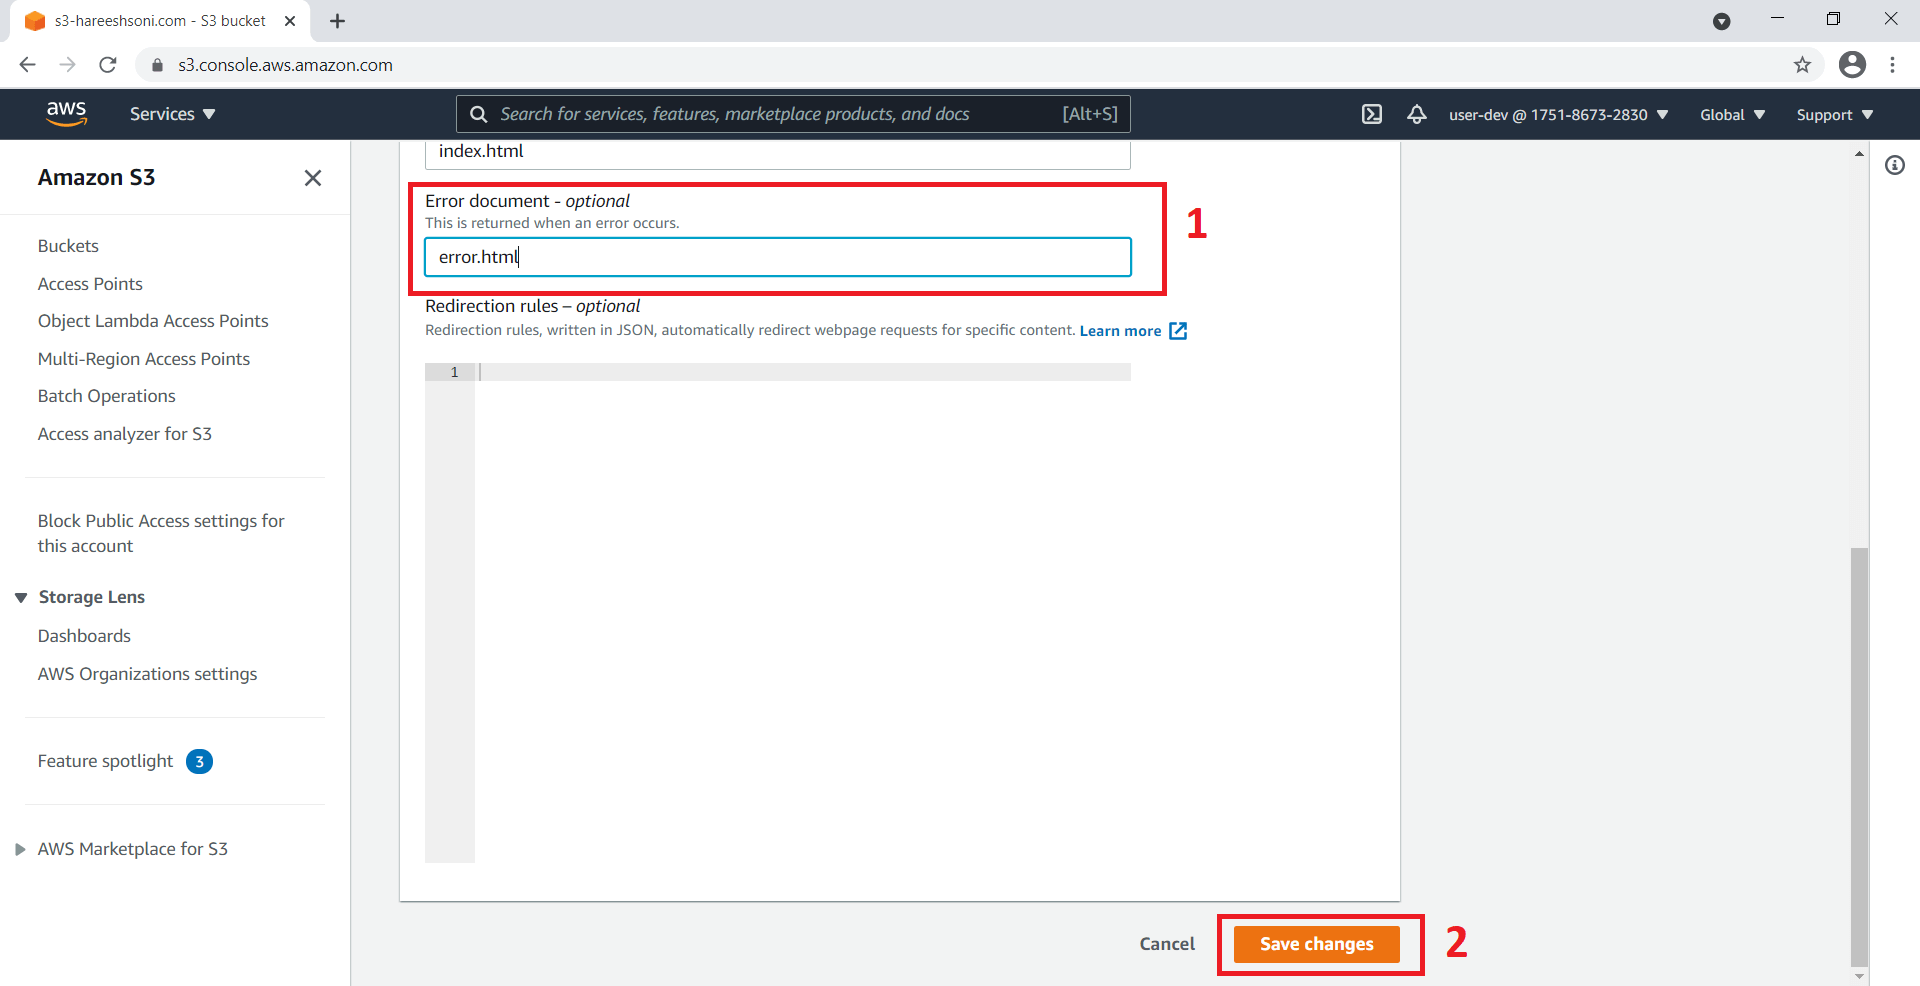
Step 6: Provide error.html inside Error document (error.html is an optional file). Click on the Save changes button.
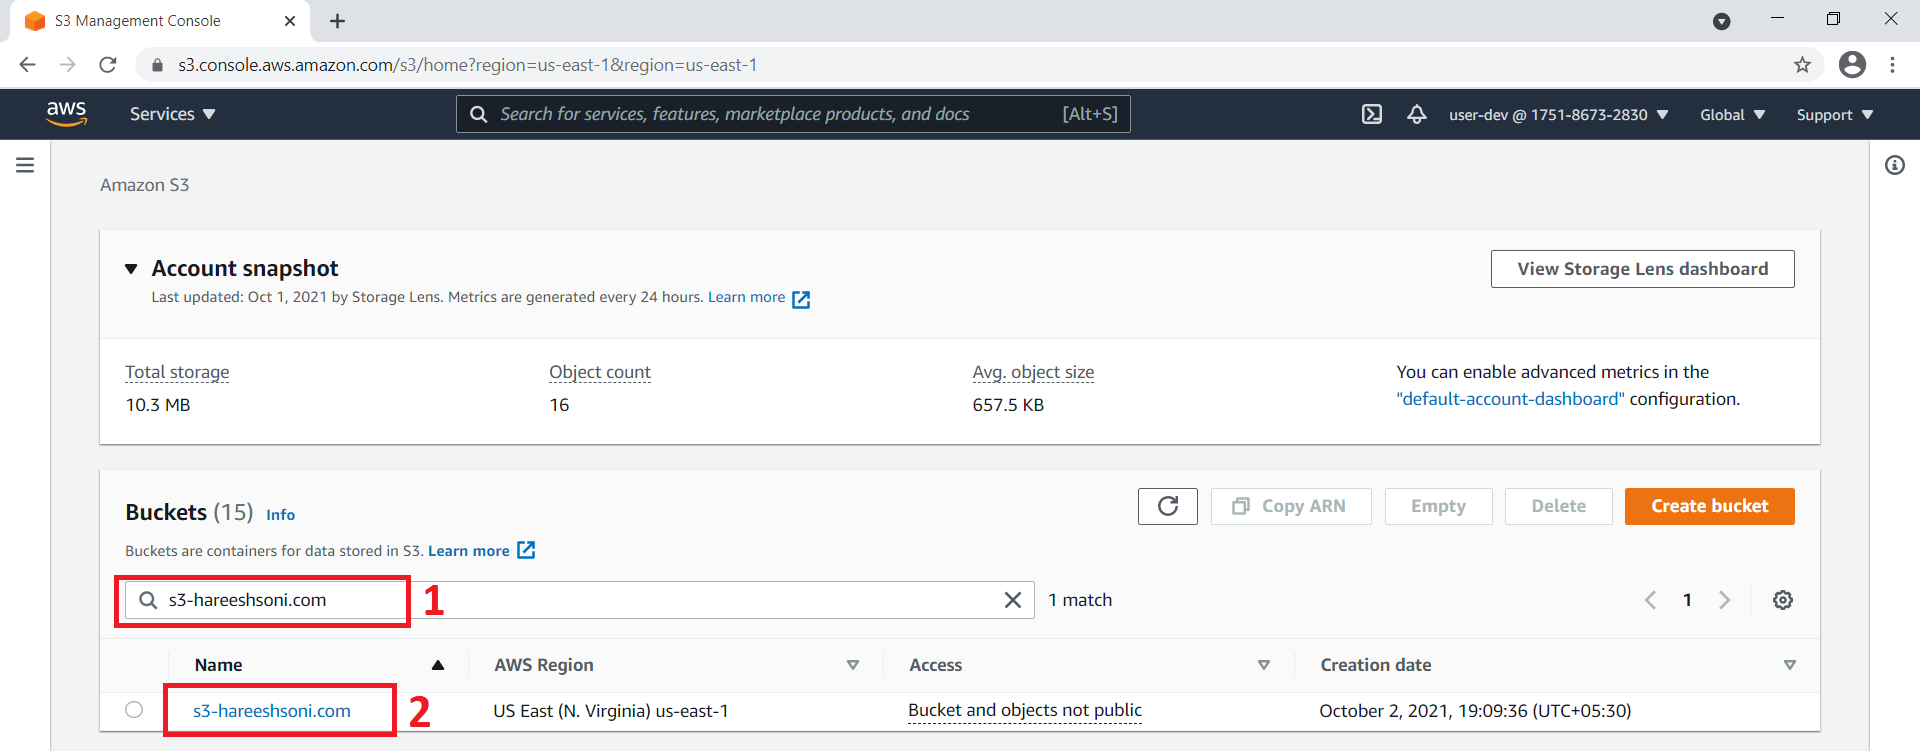
Step 7: Search bucket using bucket name. Click on bucket name. Click on the Properties tab.
Step 8: Click on the URL under Bucket website endpoint.
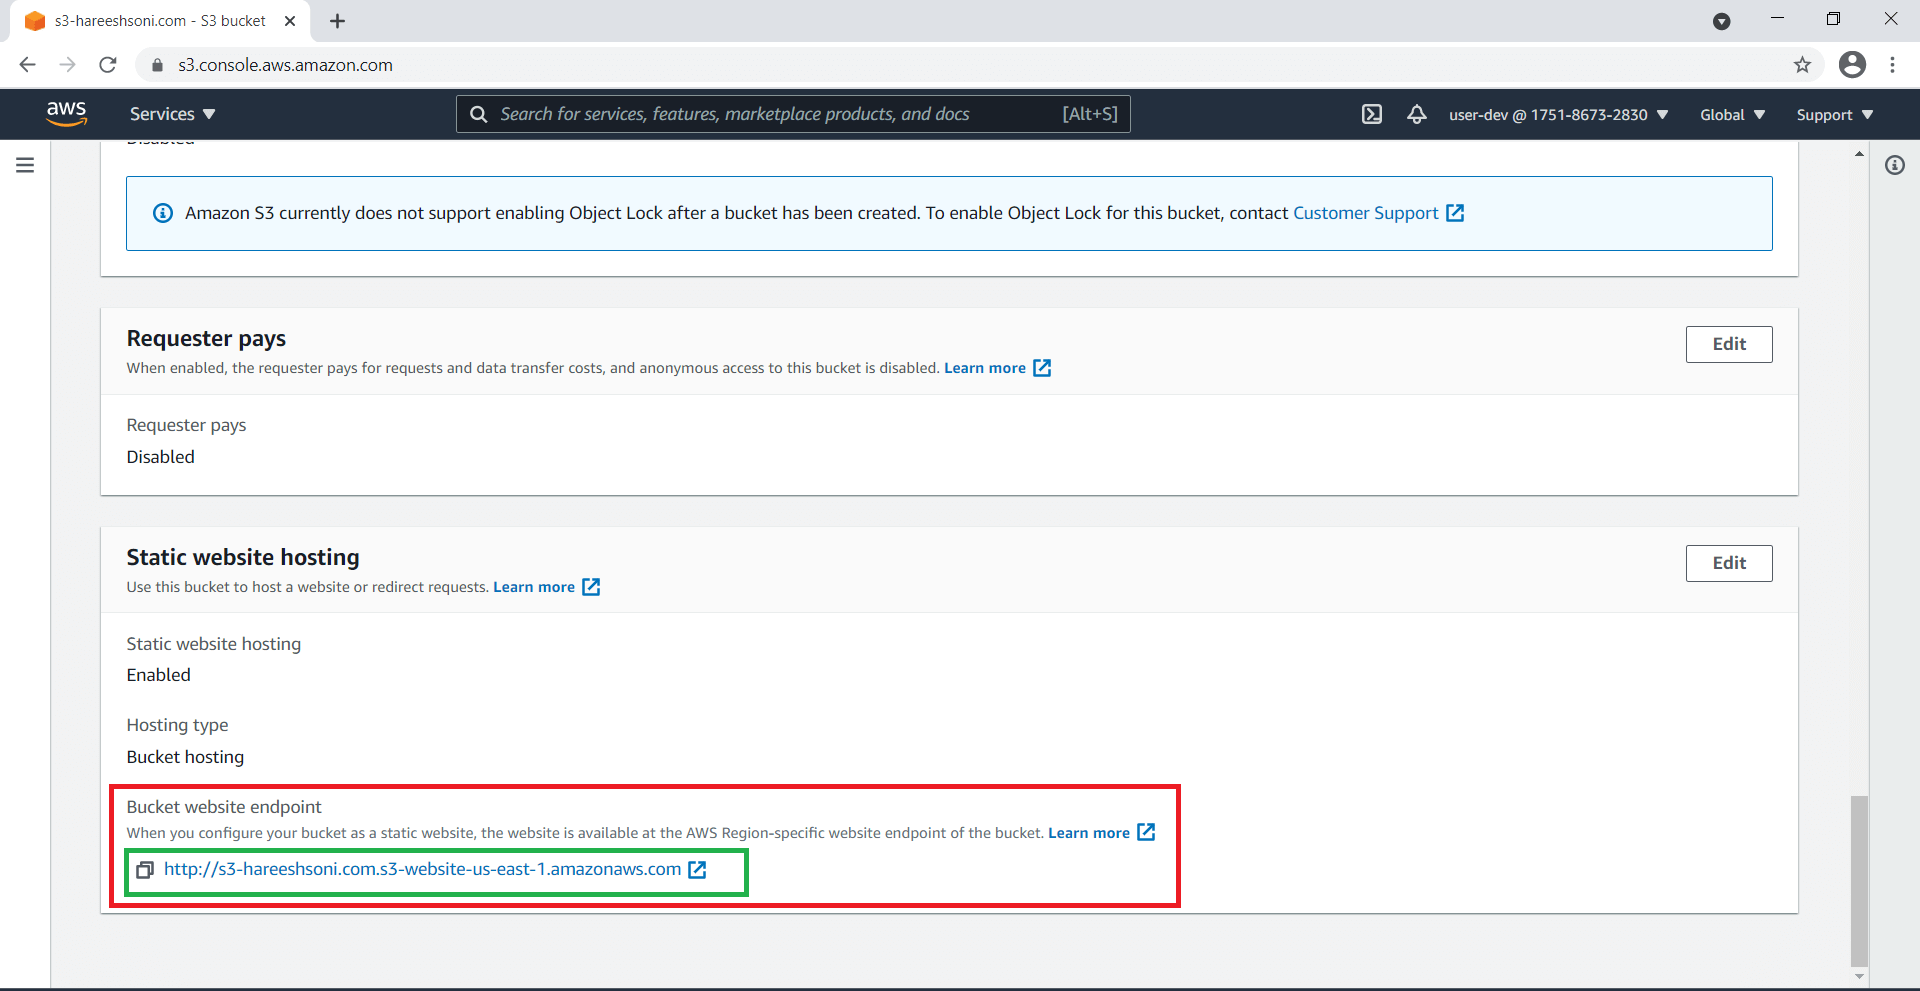
Step 9: Static website is ready. Now you can see the index.html page.
